As more organizations move workloads to public cloud platforms, protecting those workloads becomes just as critical as protecting on-premises infrastructure. Veeam Backup for Public Cloud is a native, Azure-aware backup product that integrates directly with Microsoft Azure through the Veeam Service Provider Console (VSPC) and Veeam Backup & Replication.
In this blog, I will walk through the complete, step-by-step process of configuring Azure VM backups using Veeam Backup for Microsoft Azure from the Veeam Service Provider Console. This guide is written primarily for tenants, end users, and backup administrators who want a practical, hands-on understanding of how Azure backup works inside VSPC.
Prerequisites
Before you begin, make sure the following are in place:
- Access to the Veeam Service Provider Console (VSPC) with tenant credentials.
- An active Microsoft Azure subscription.
- A Global Administrator or Owner role on the Azure subscription — required to create the Microsoft Entra service principal during account registration.
- Azure Blob Storage containers already provisioned by your service provider (Veeam uses these as backup repositories).
- The Veeam Backup Appliance deployed in Azure and assigned to your tenant account by the service provider.
Part 1: Accessing the Veeam Public Cloud Portal
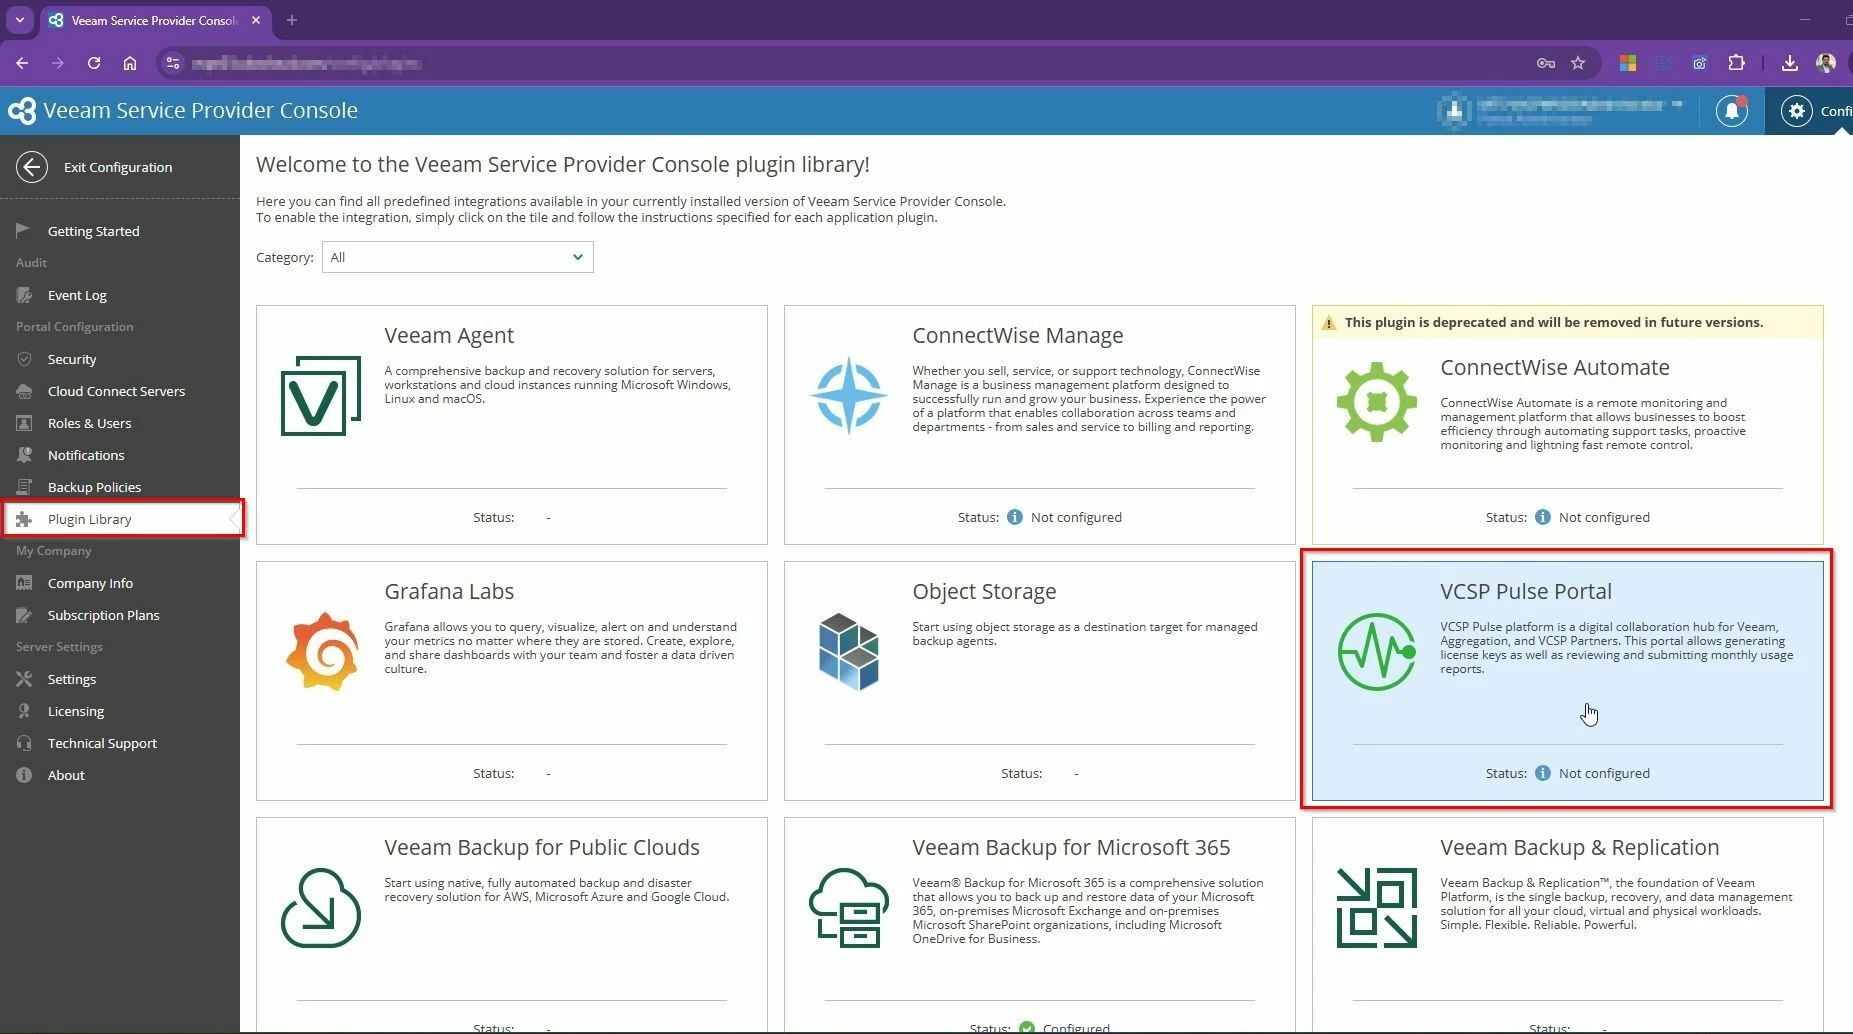
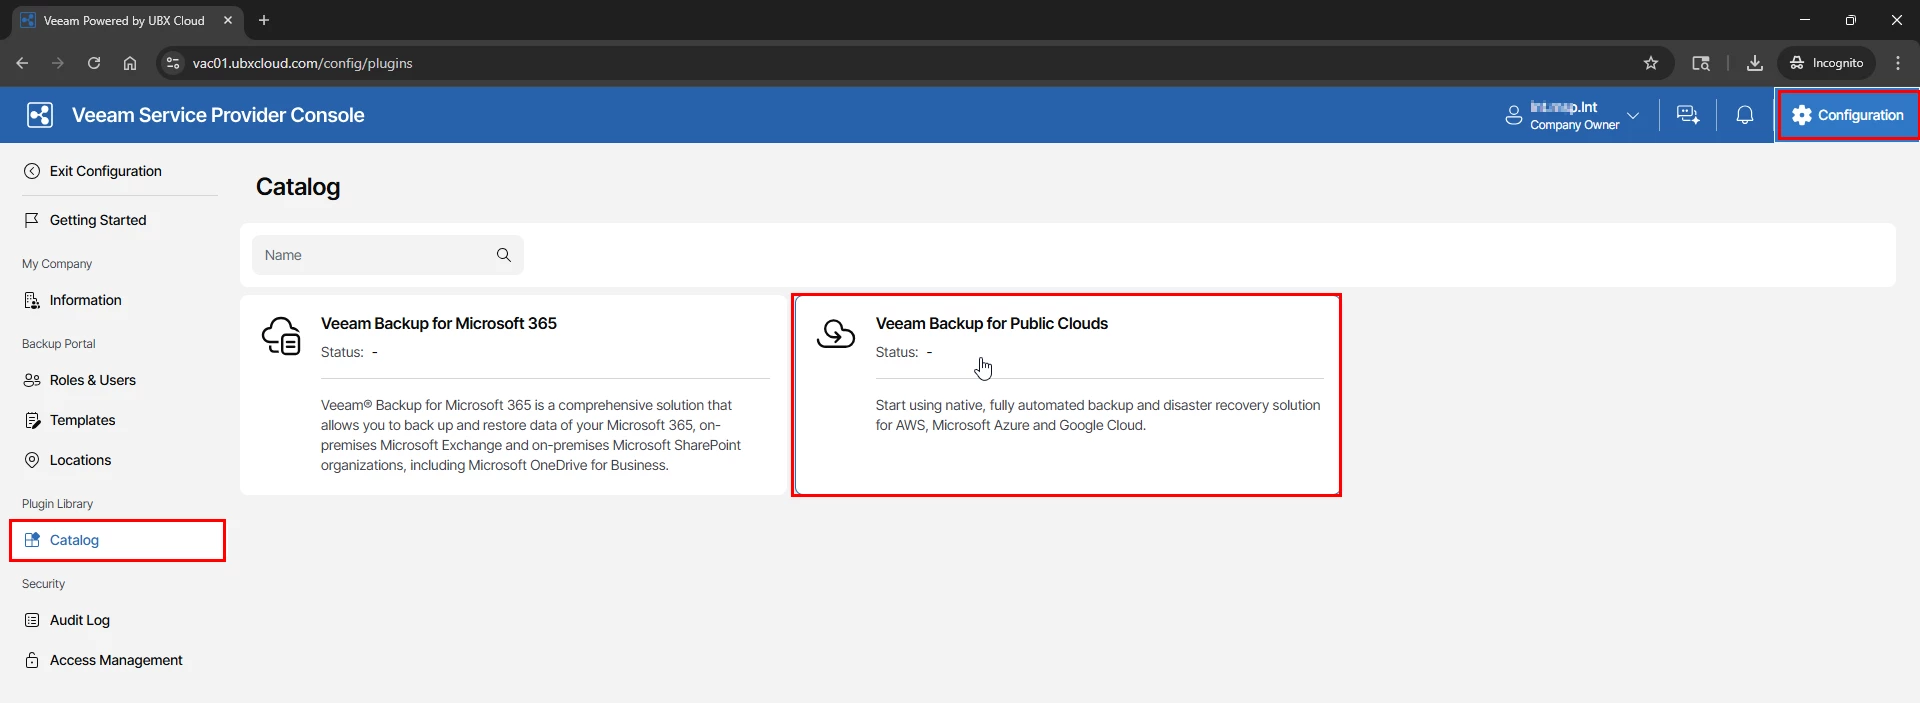
Log in to the Veeam Service Provider Console using your tenant credentials. In the top-right
corner, click Configuration. In the left sidebar under Plugin Library, select Catalog. You will
see the available plugins — locate and select Veeam Backup for Public Clouds

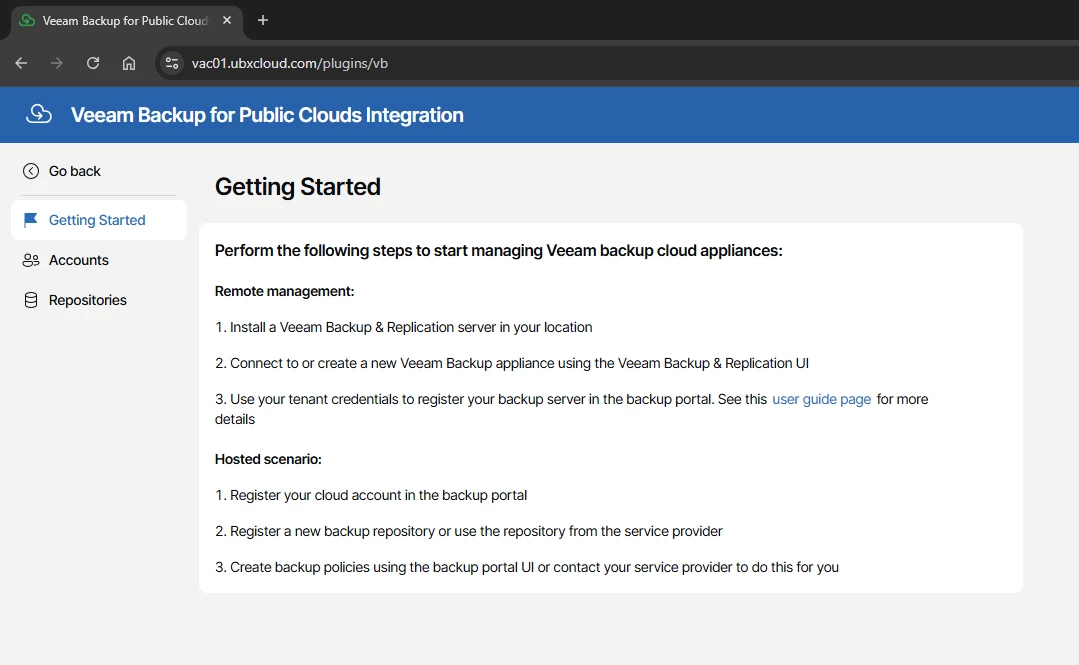
The plugin opens the Getting Started page, which presents two deployment scenarios:
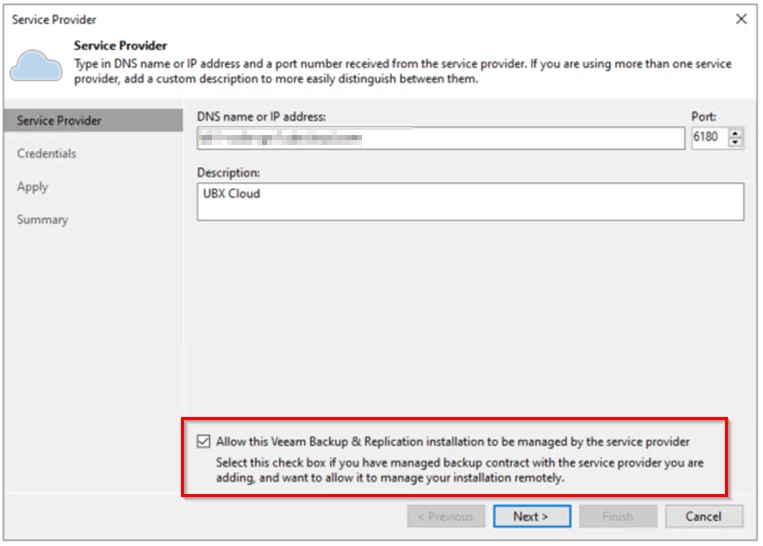
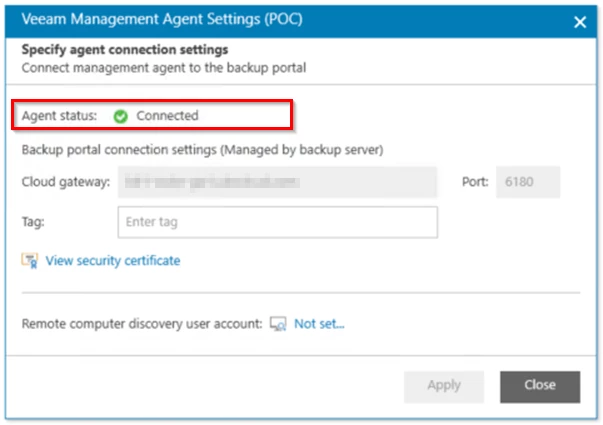
Remote Management — You have an on-premises Veeam Backup & Replication (VBR)
server and want it to manage an Azure backup appliance. This is typical for hybrid environments where centralized control from on-premises is required.
Hosted Scenario — Your service provider hosts the backup appliance for you inside Azure.
You register your Azure account in the portal, select a repository, and create backup policies. This is the model used throughout this blog.
For the Hosted Scenario, the three setup steps are:
- Register your cloud account in the backup portal.
- Select a backup appliance and repository provided by your service provider.
- Create backup policies to protect your Azure VMs.

Part 2: Registering Your Microsoft Azure Account
The first real configuration task is connecting your Azure subscription to the Veeam appliance. This is done through the Add Account wizard, which automatically creates a Microsoft Entra (formerly Azure AD) service principal and assigns the required Azure RBAC roles — no manual work in the Azure portal is needed.
In the left sidebar, click Accounts, stay on the Public Cloud tab, then click → Microsoft Azure
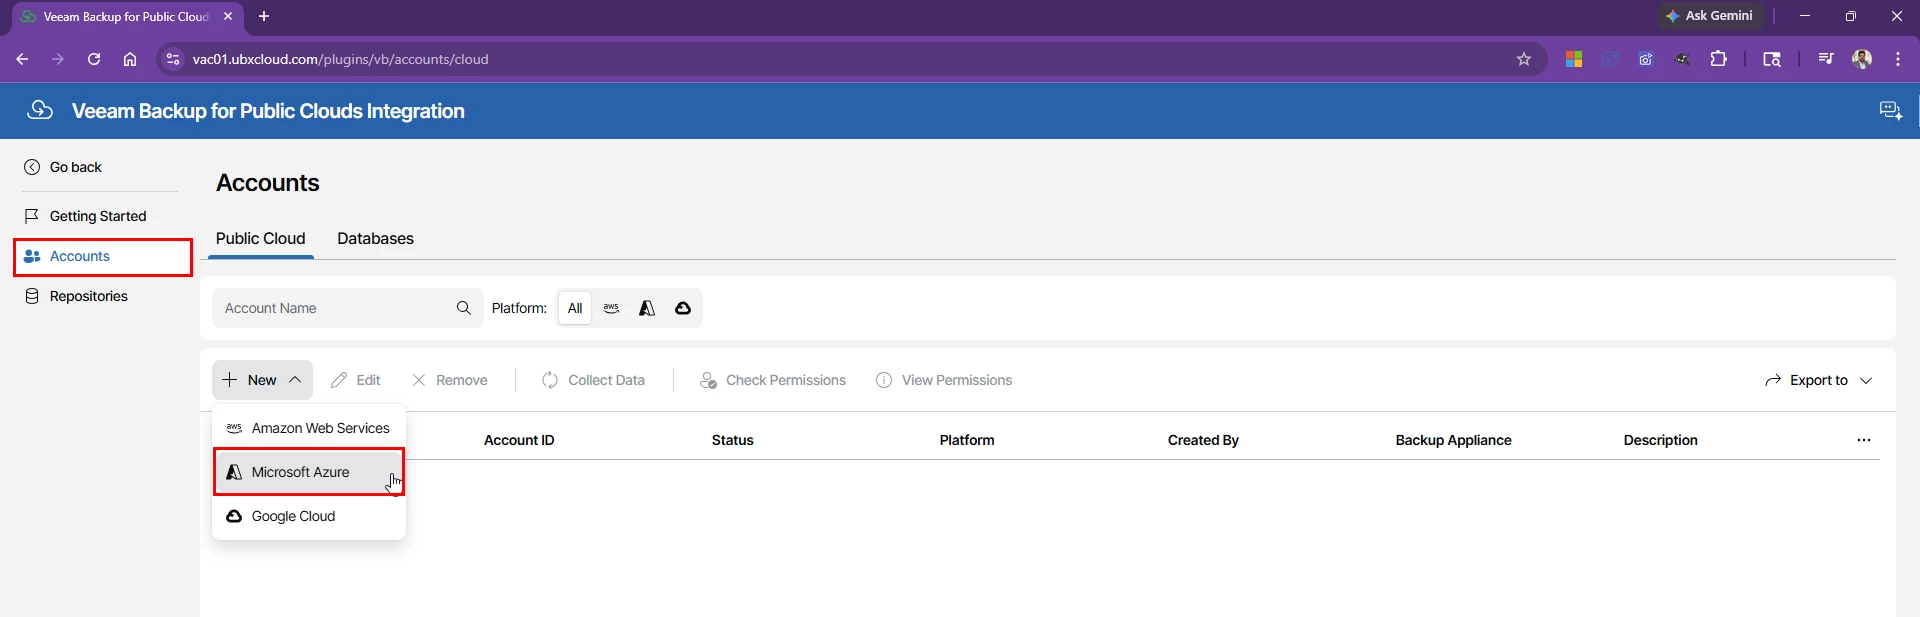

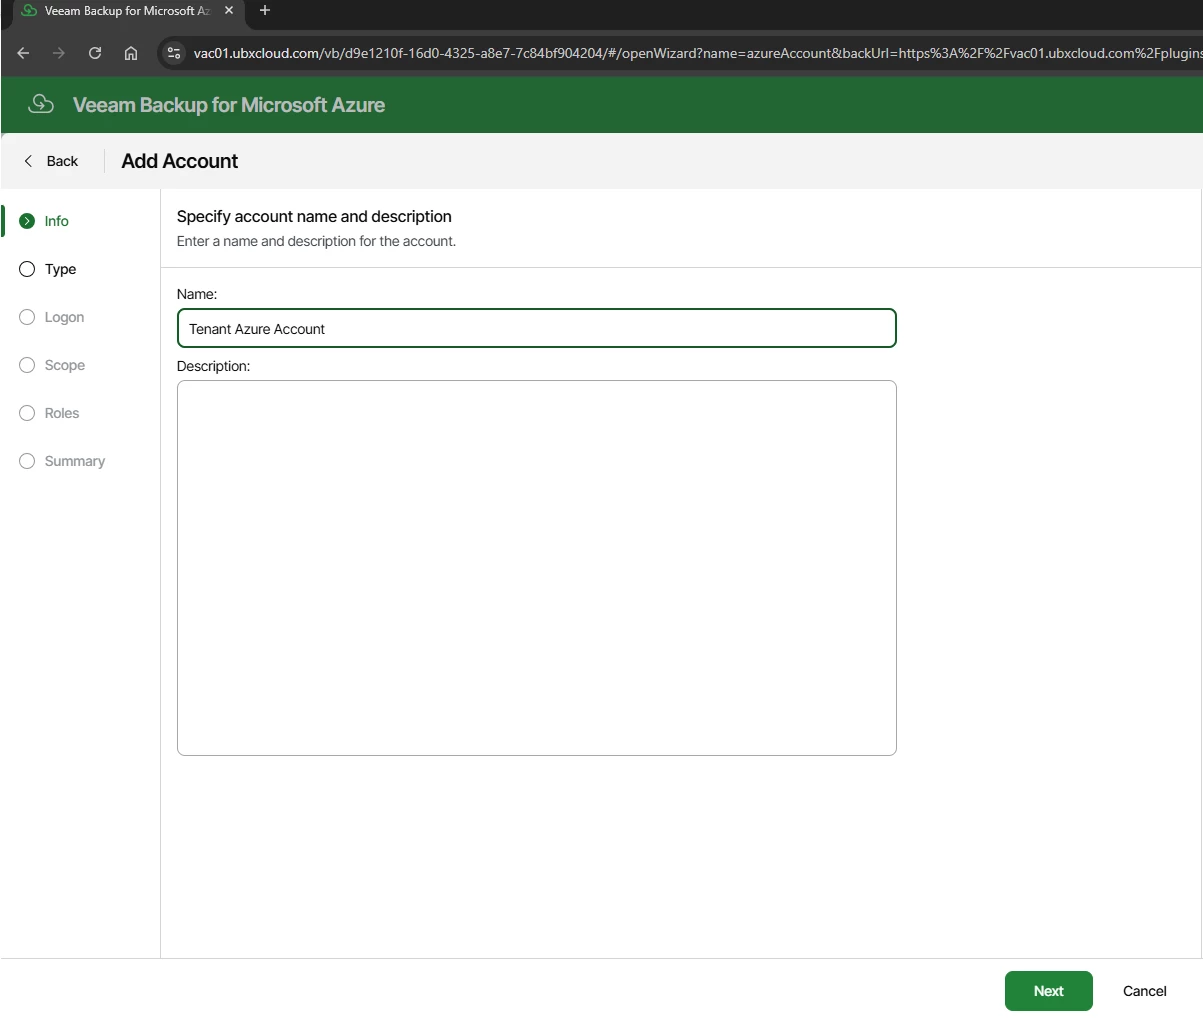
Enter a meaningful display name for this account. This name is used throughout the portal, so choose something that clearly identifies the tenant or Azure subscription

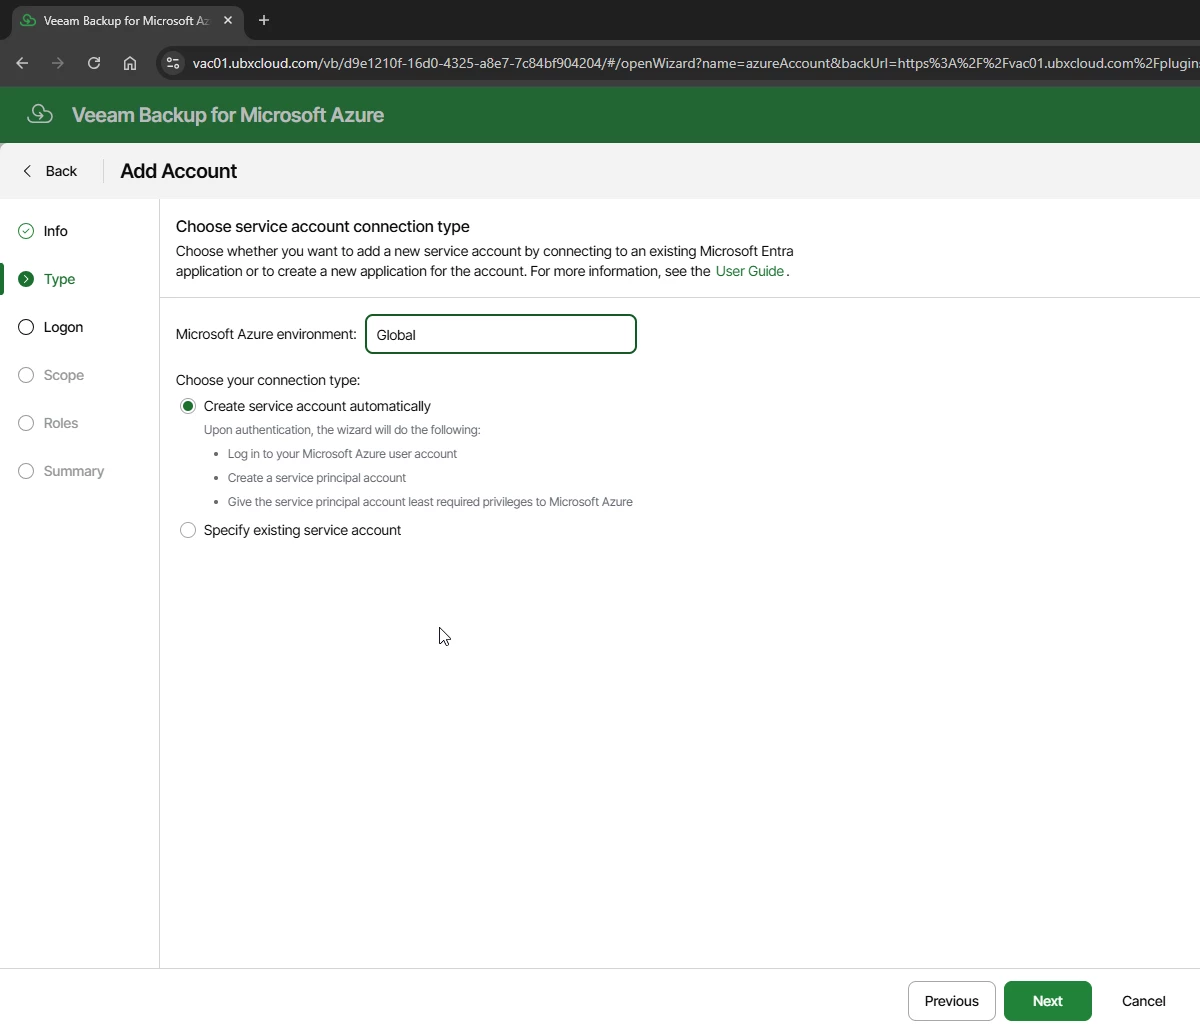
On the Type step, set the Microsoft Azure environment to Global (or the appropriate sovereign cloud if applicable).
Under Connection Type, select Create service account automatically. This option signs in
as your user account, creates a service principal in Microsoft Entra, and assigns it the minimum
required RBAC roles all without any manual work in the Azure portal. Click Next.

Authenticate to Azure Using the Device Code Flow
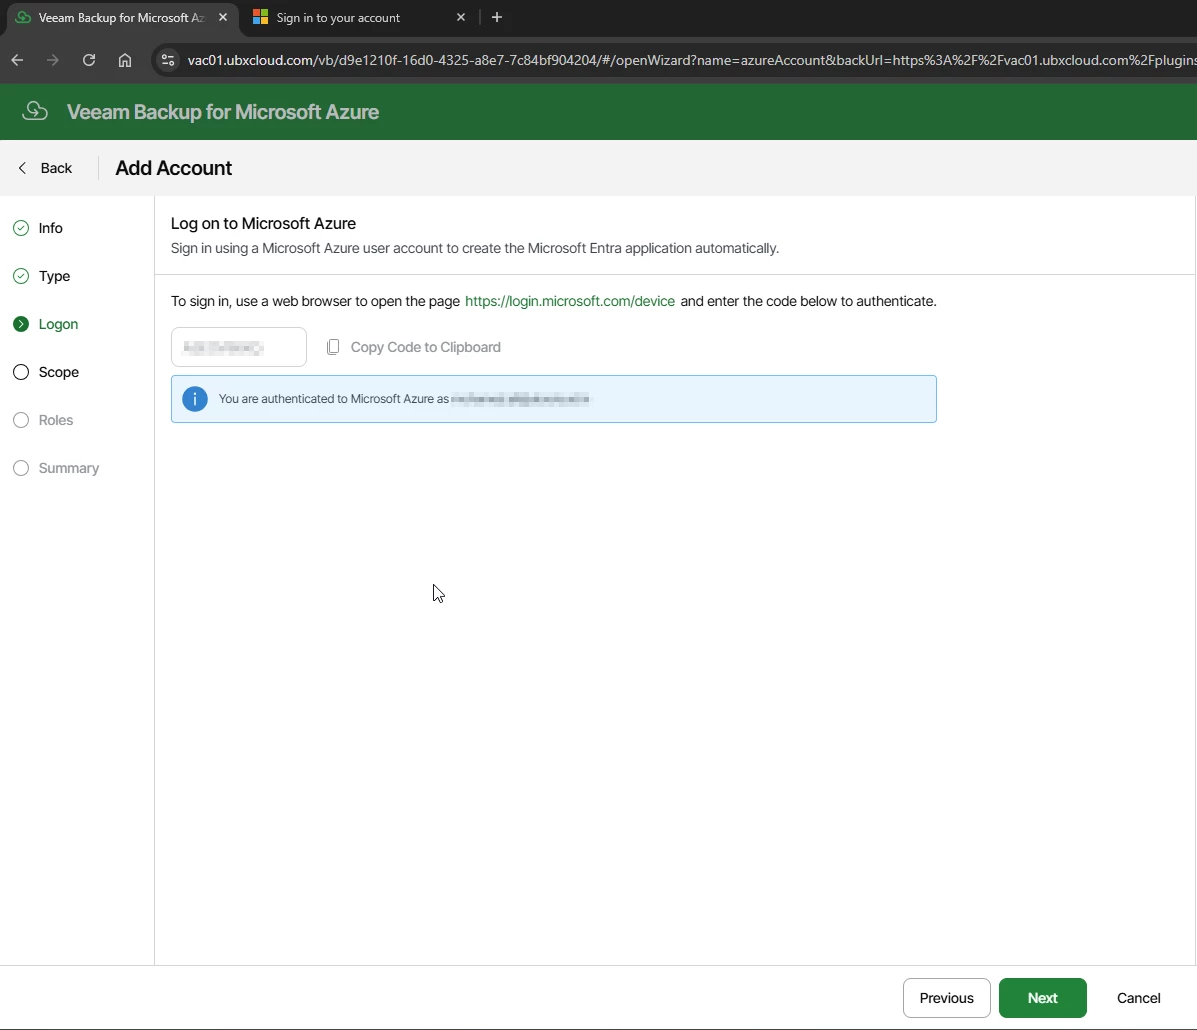

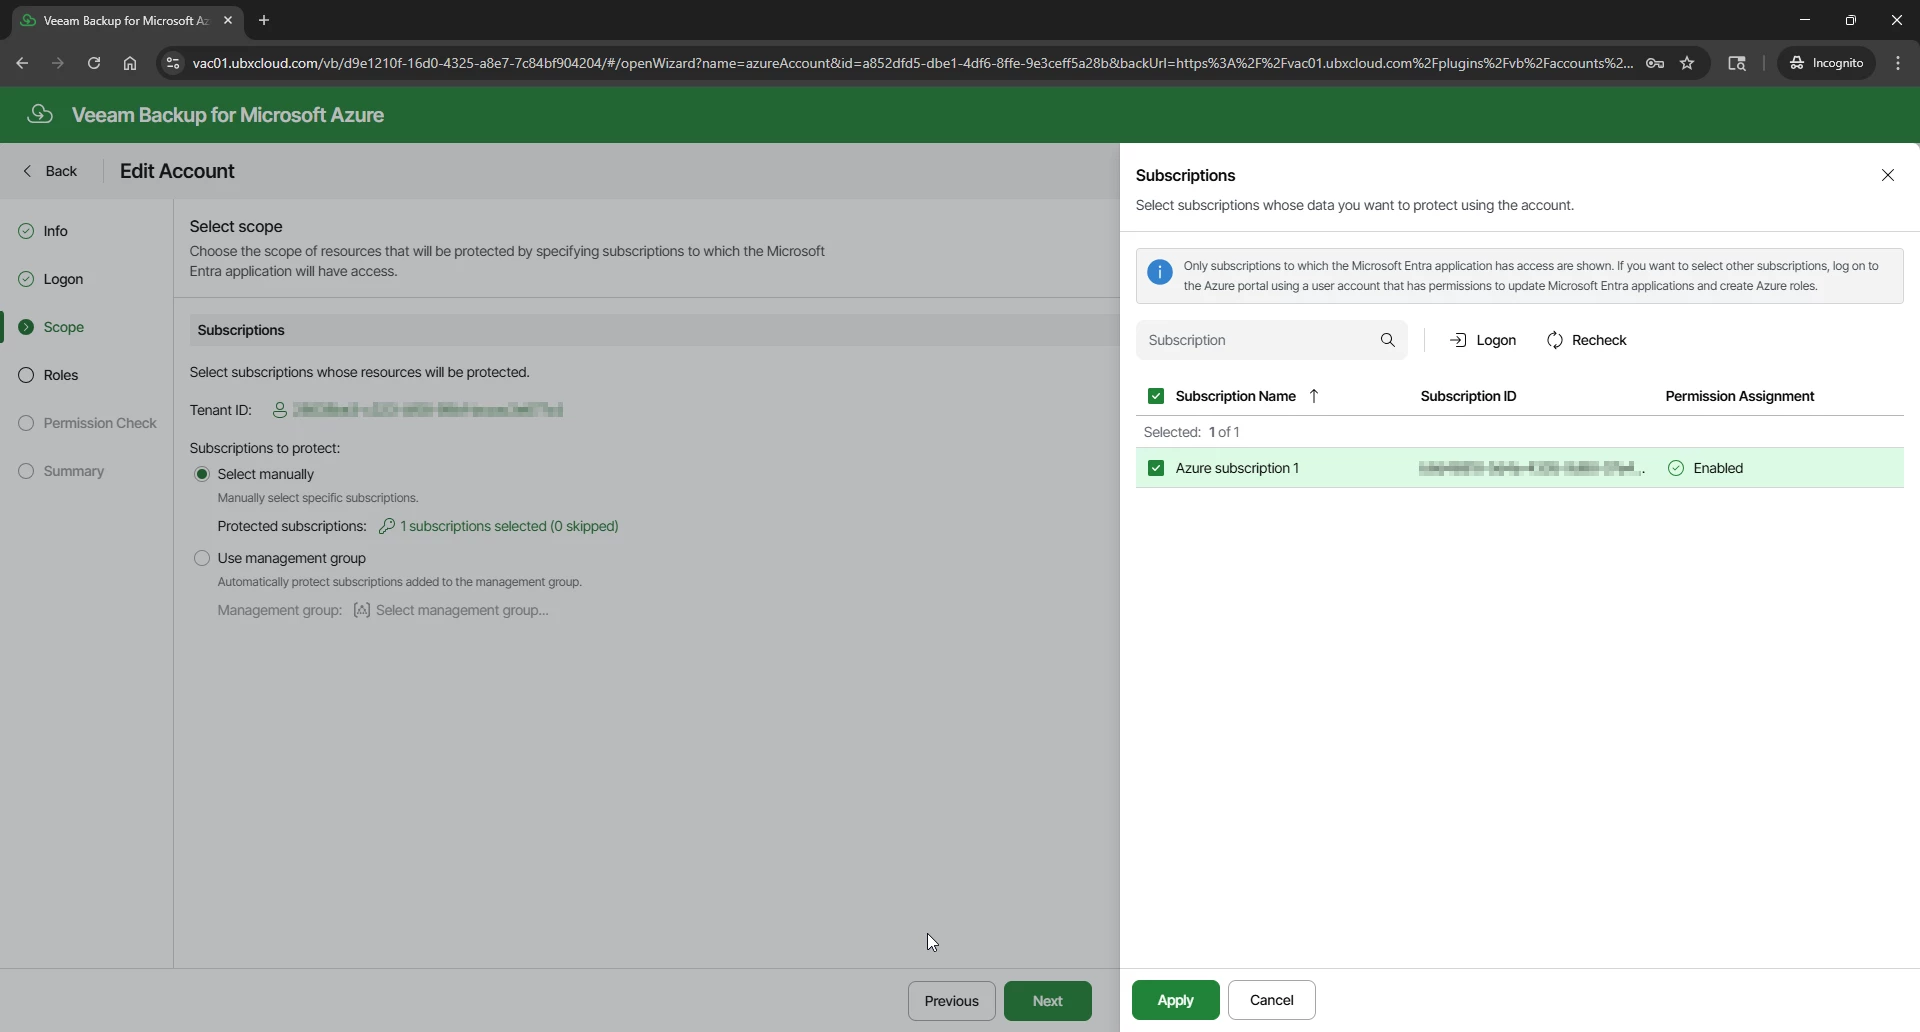
Once logon authorization completed. The Scope step displays all subscriptions accessible to the authenticated account. Select the subscriptions this account should manage. Two options are available:
Select manually — Check individual subscriptions. Recommended for environments with a defined set of subscriptions.
Use management group — Automatically includes all subscriptions within a management group. Useful when subscriptions are added dynamically in large enterprise environments.
Select the target subscription and click Apply, then Next

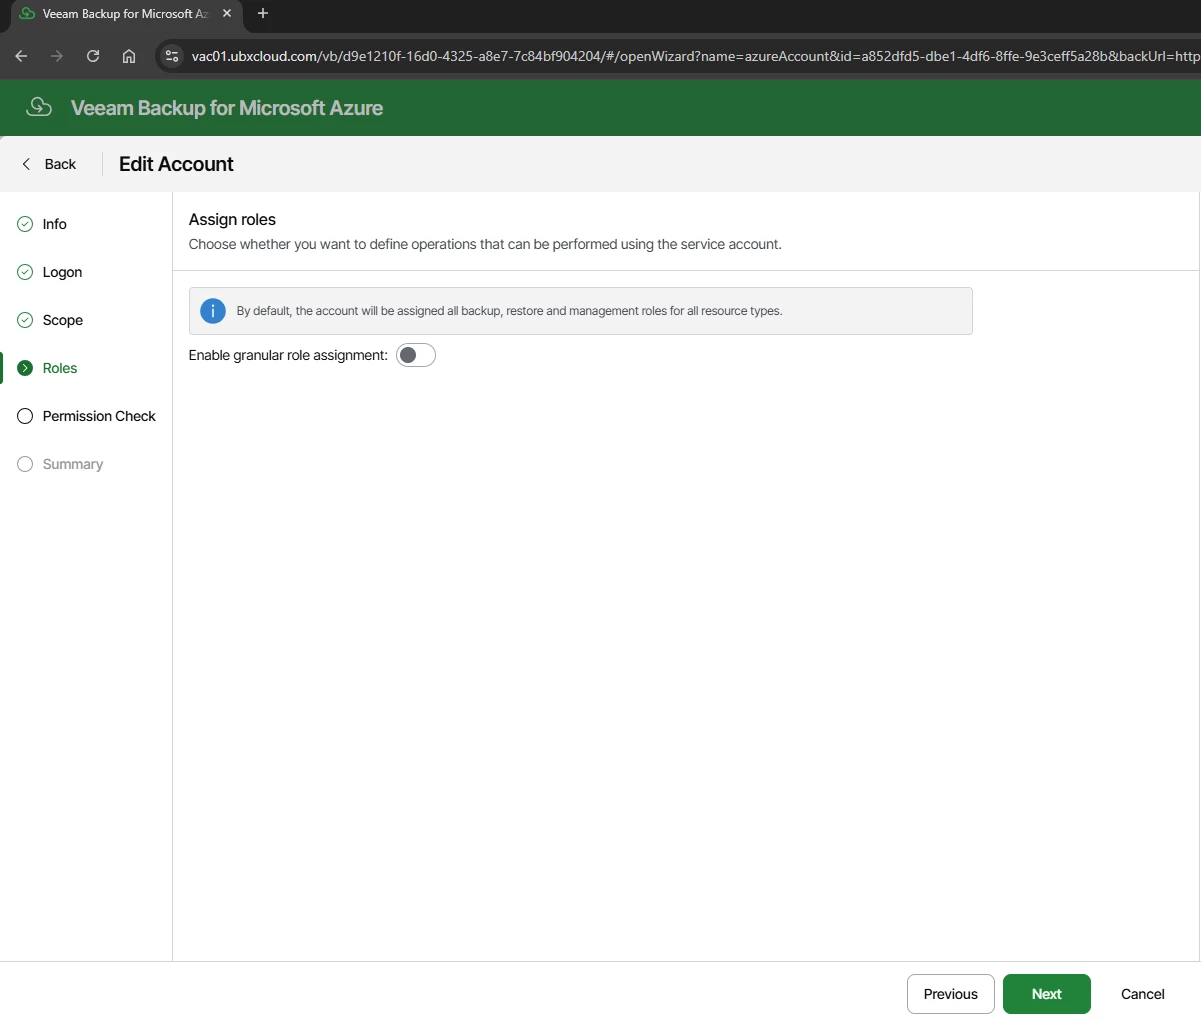
The Roles step controls which operations the service account is permitted to perform. By default, Veeam assigns the full set of backup, restore, and management roles across all supported Azure resource types: Azure VM, Azure SQL, Azure Files, Virtual Network, and Cosmos DB.
Leave Enable granular role assignment turned Off unless a specific security requirement
calls for restricting the account to a subset of operations. Click Next

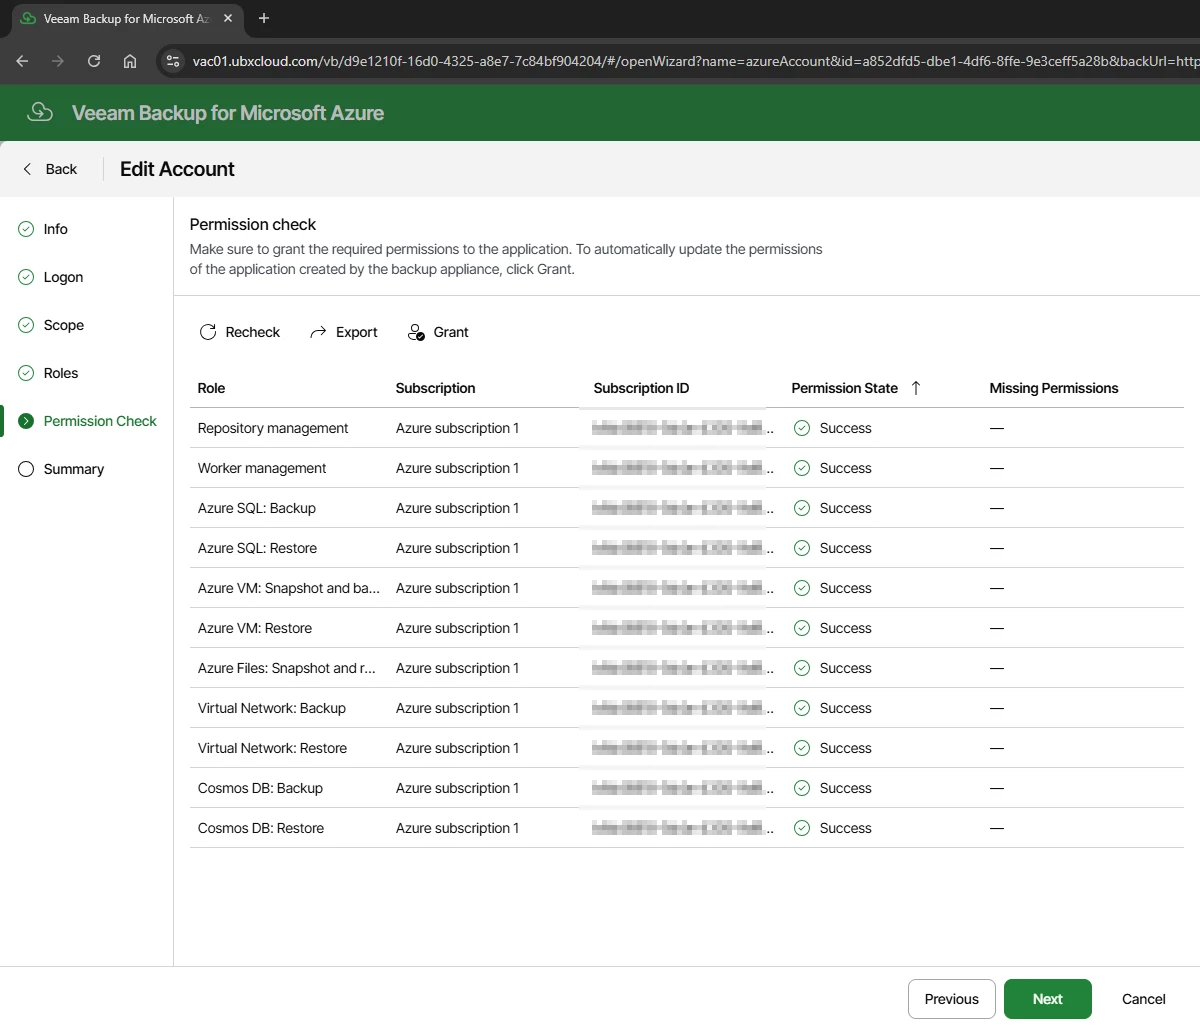
The Permission Check step runs an automated audit of the service principal against the selected subscriptions. Every role should show a Success status, including: Repository management, Worker management, Azure VM Snapshot and Backup, Azure VM Restore, Azure SQL Backup/Restore, Azure Files, Virtual Network, and Cosmos DB.
If any role shows a missing permission, click Grant to apply the required RBAC assignment before proceeding.

Review the Summary and Click Finish
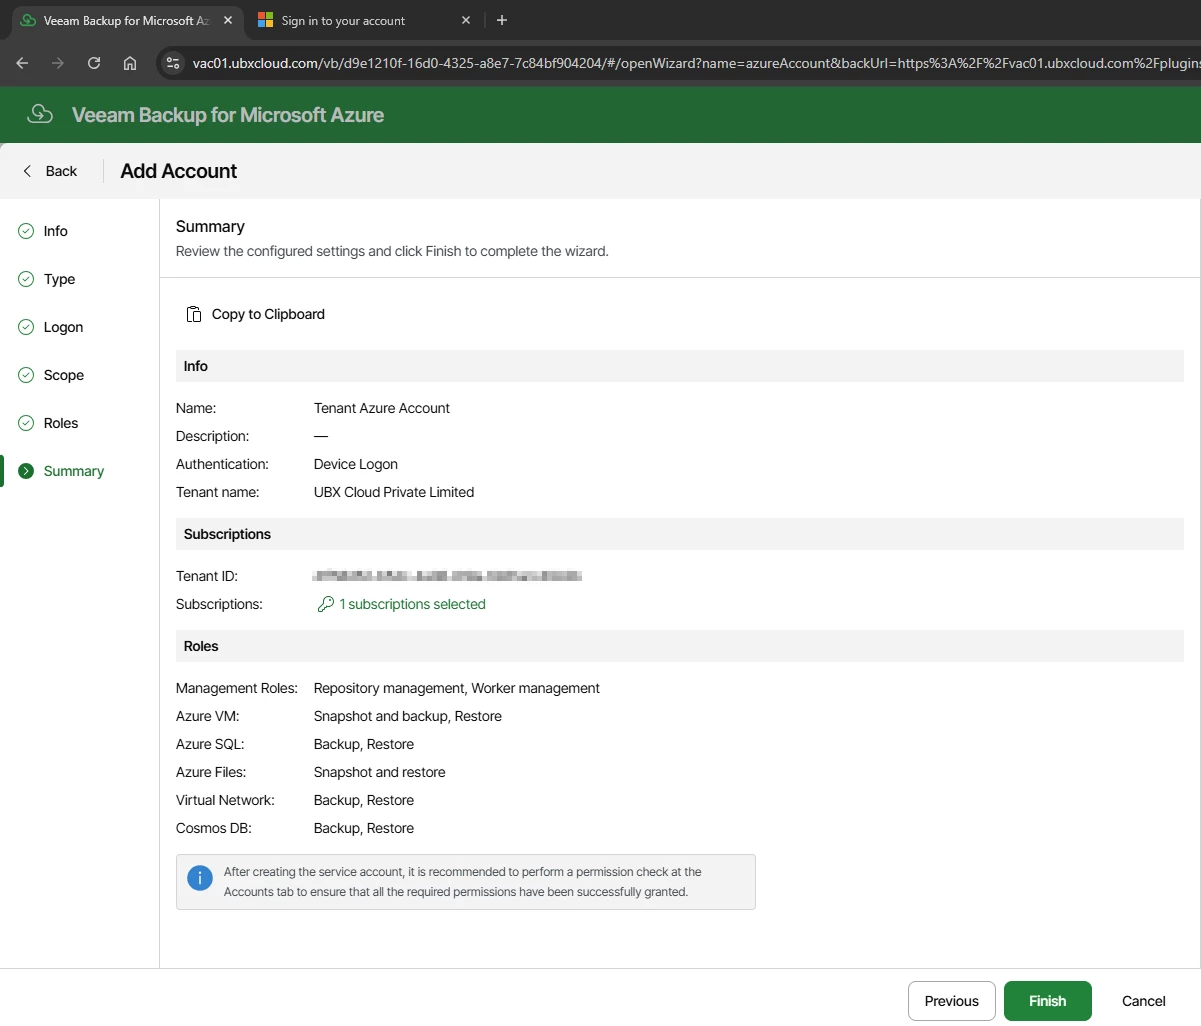

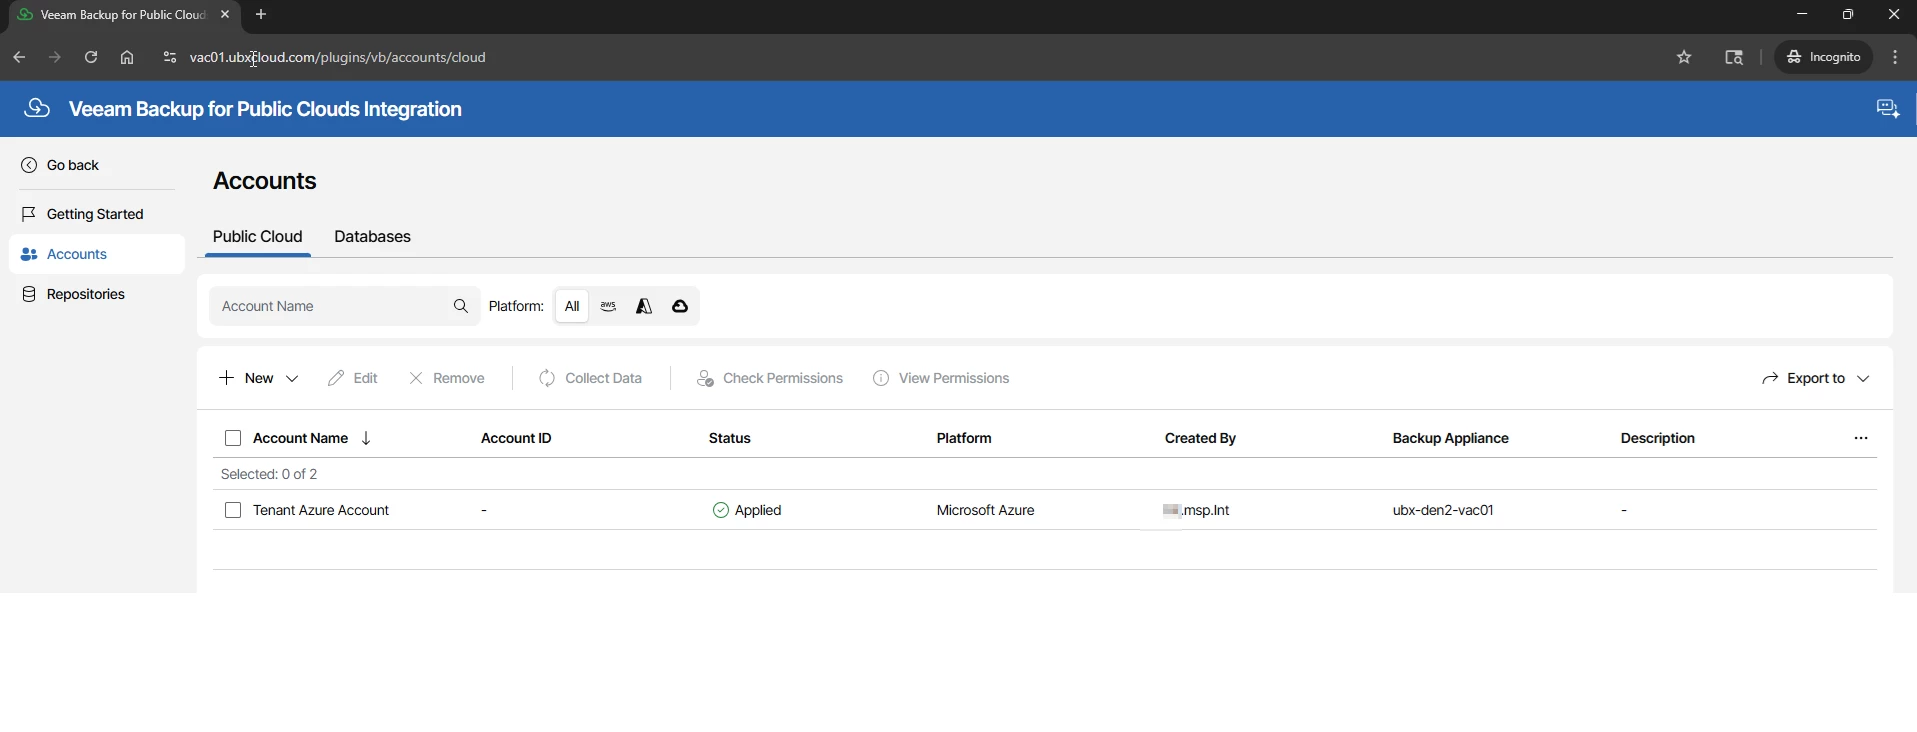
After the wizard completes, the portal returns to the Accounts list. The new account should
appear with a status of Applied and ready.
This confirms that the service principal is active in Microsoft Entra, the required RBAC roles are assigned to the subscription, and the Veeam appliance has validated connectivity.

Understanding Backup Repositories and Storage Tiers
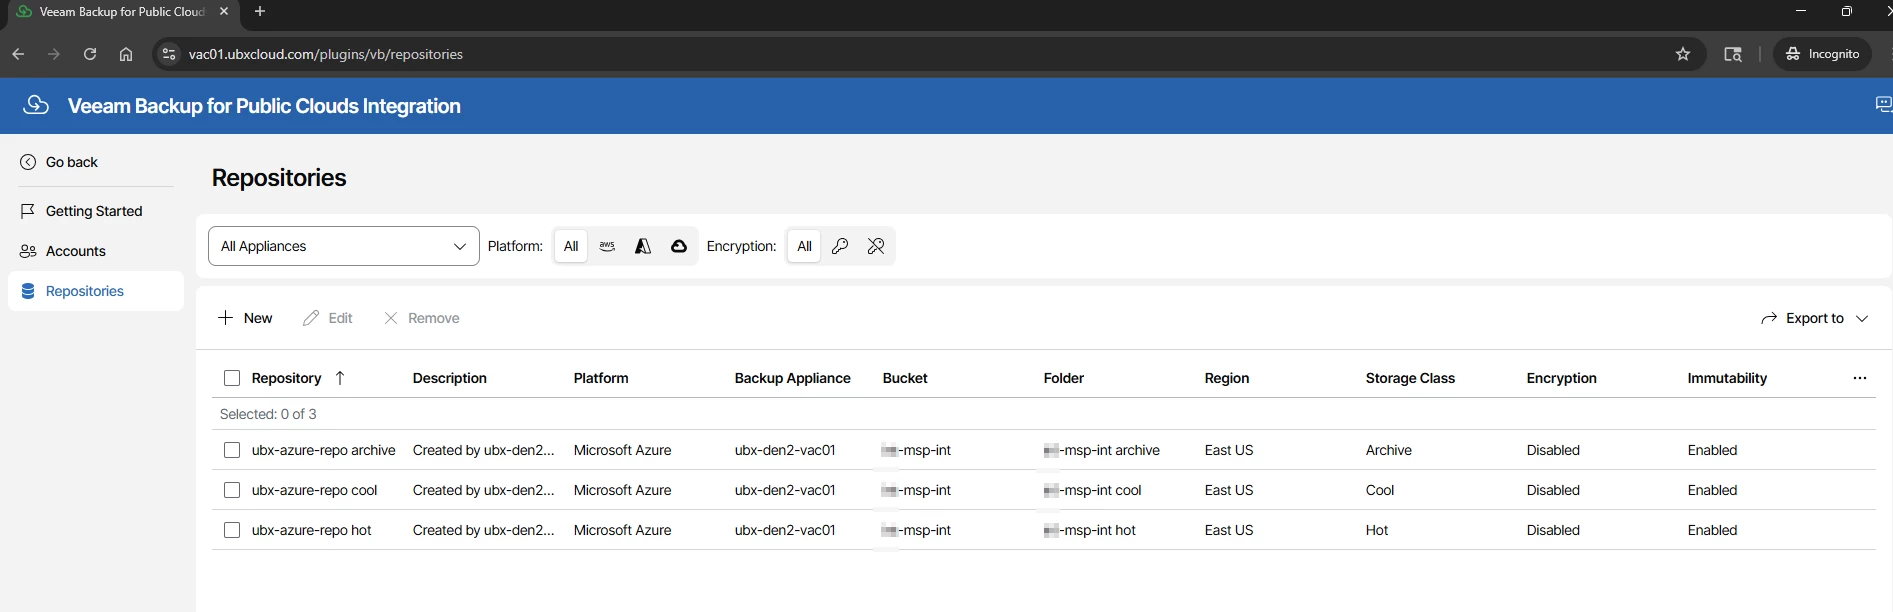
Before creating a backup policy, it is worth reviewing the repositories that your service provider has made available by the service provider.
Click → Repositories in the left sidebar. Veeam stores backup data in Azure Blob Storage containers, and the storage tier you assign to each backup schedule directly impacts both cost and restore performance.

Azure Blob Storage Tiers for Veeam Backup Repositories
| Tier | Storage Cost | Retrieval Cost | Retrieval Speed | Min. Retention | Best Use in Veeam |
| Hot | ~$0.018/GB/month | Free | Instant | None | Daily backups — fast restores |
| Cool | ~$0.010/GB/month | ~$0.01/GB | Minutes | 30 days | Weekly backups — occasional restores |
| Archive | ~$0.0018/GB/month | ~$0.022/GB | Hours (rehydration) | 180 days | Monthly/Yearly — long-term compliance |
Part 3: Creating a VM Backup Policy
A backup policy defines which Azure virtual machines to protect, how to process them during backup, when backups run, and where backup data is stored.
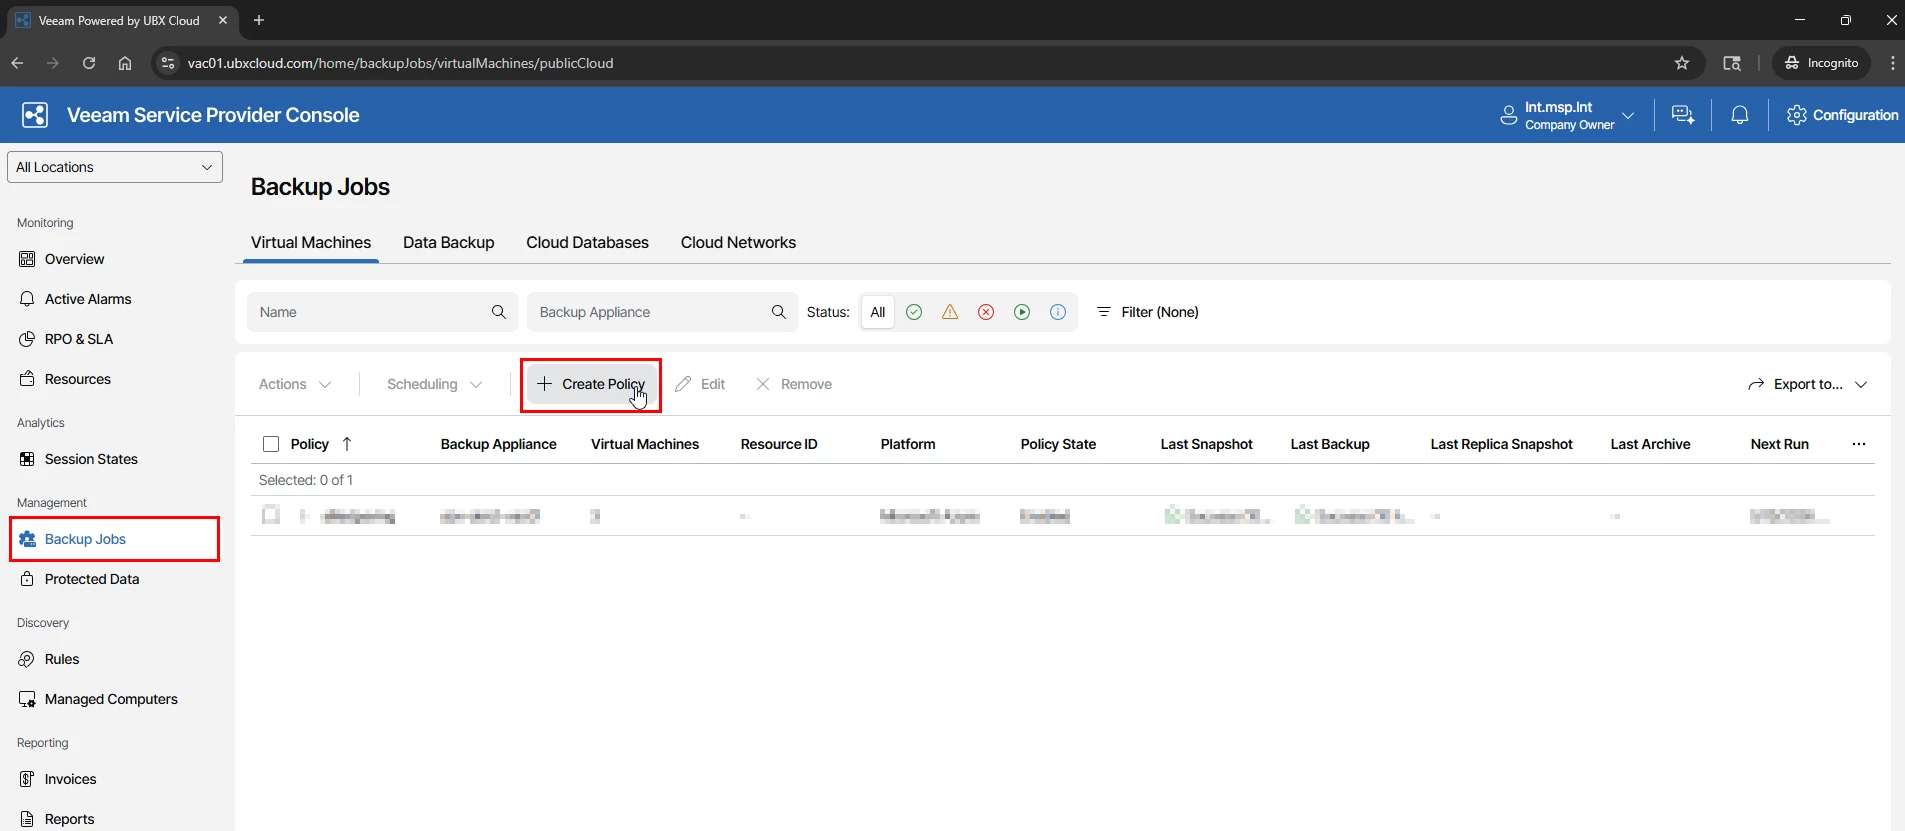
In VSPC home console, navigate to Backup Jobs in the left sidebar, select the Virtual Machines tab, and click → Create Policy

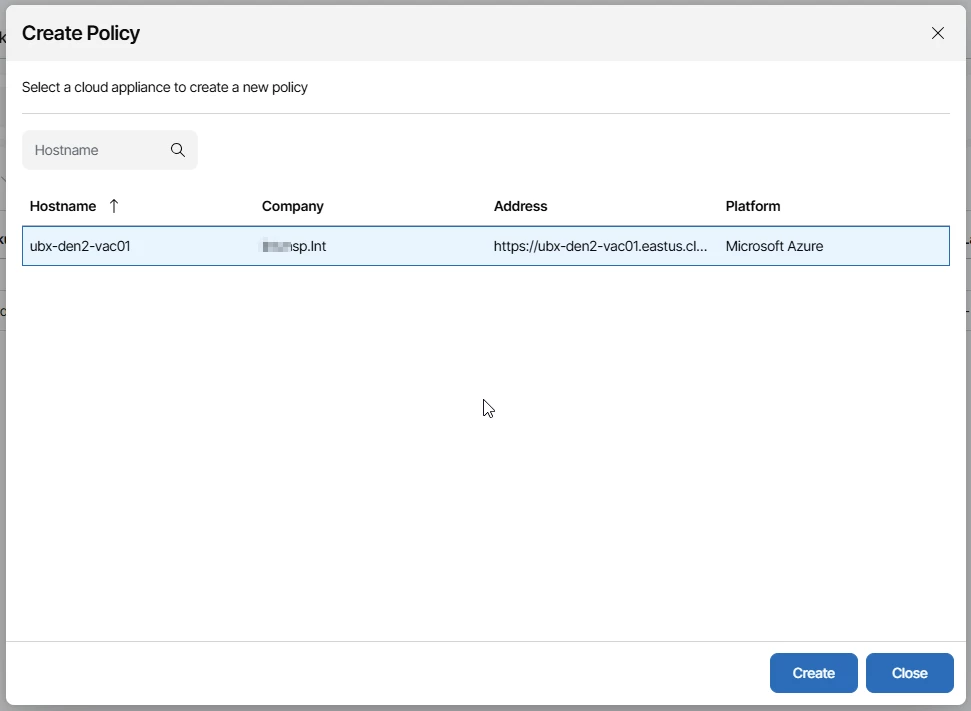
Select the Azure appliance (Assigned to your tenant by the service provider) and click Create. The Add VM Policy wizard opens directly on that appliance

At the Policy Info step, enter a name and optional description for the policy


The Sources step has three sections that together define the full backup scope:
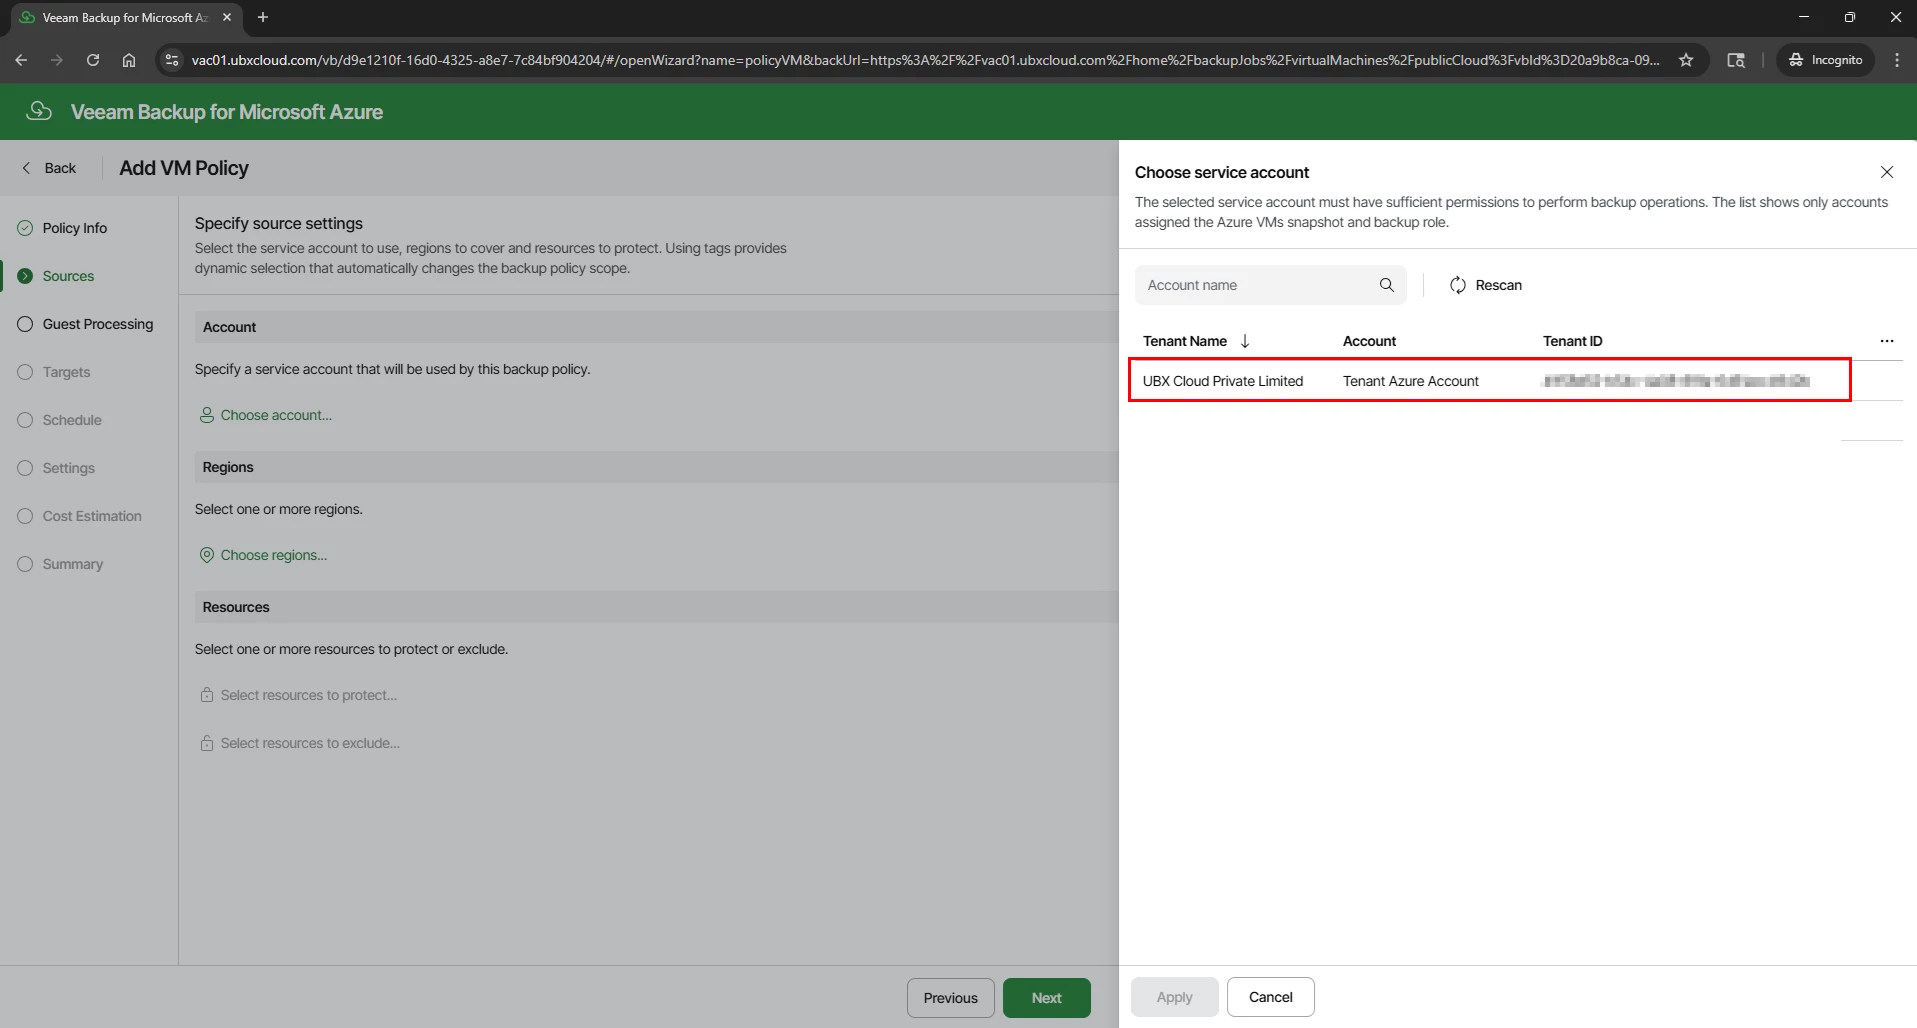
Account: Click Choose account and select the Azure account registered in Part 2. This determines which Azure tenant and subscription the policy operates in.
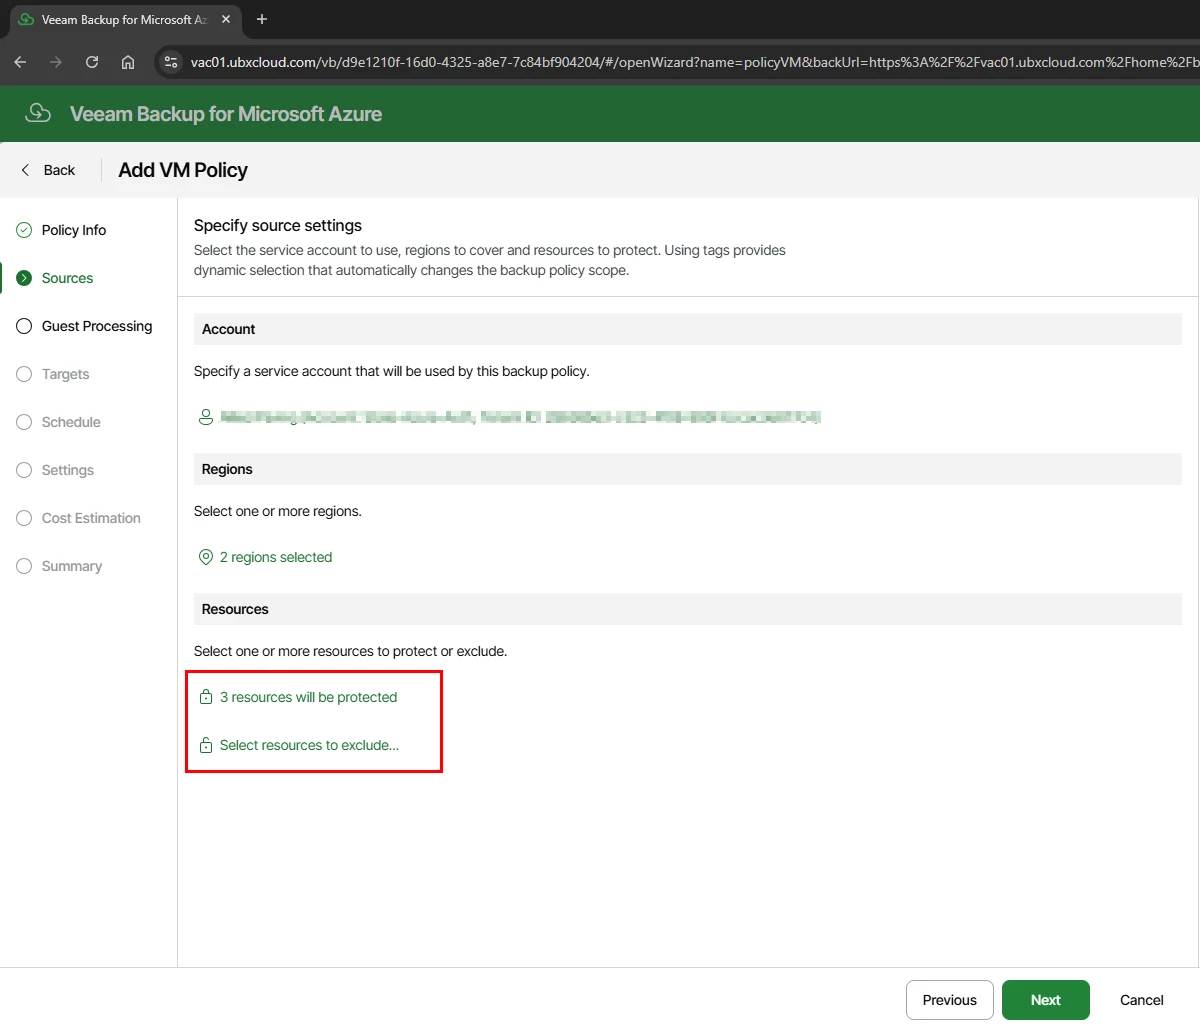
Regions: Click Choose regions and select the Azure regions where the target VMs are located. You can select multiple regions if your VMs span more than one.
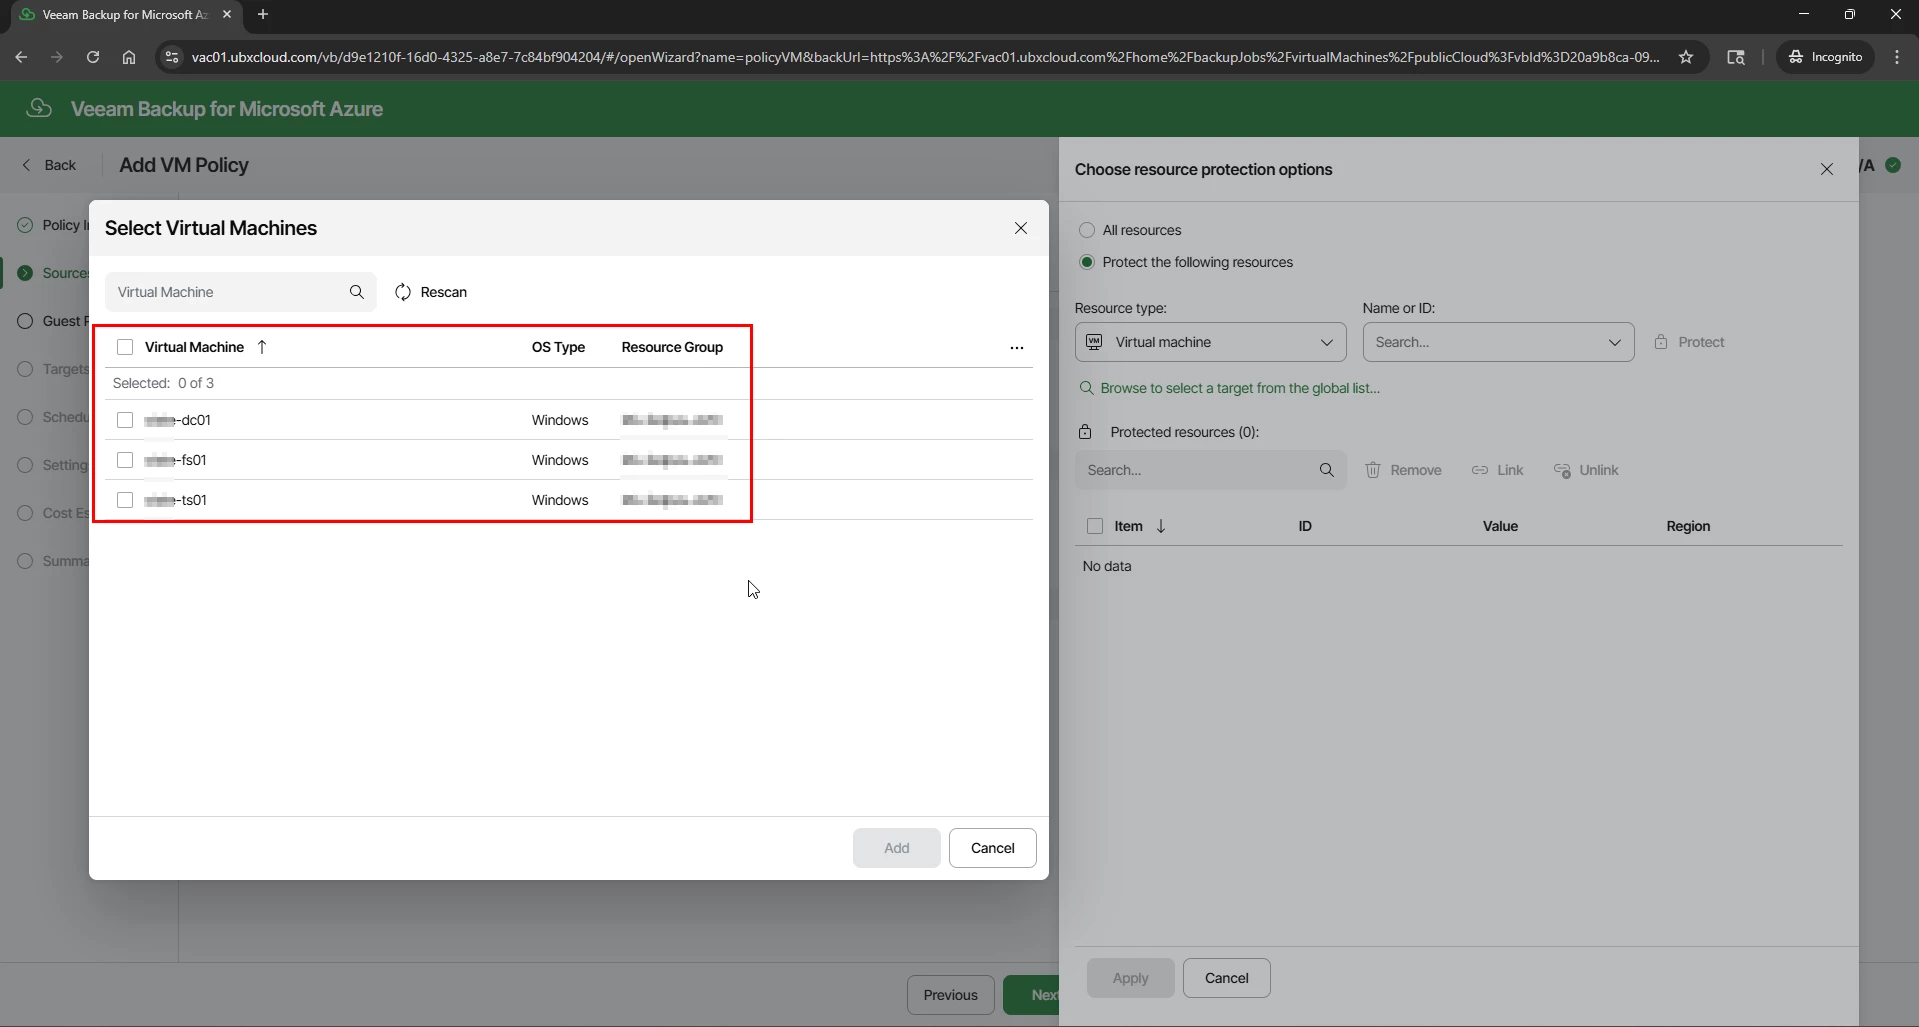
Resources: Click Select resources to protect to open the VM picker. You can select individual VMs by name, or use resource tags for dynamic scoping. Tagged resources are automatically included in the policy whenever new VMs with matching tags are created in Azure — this removes the need to manually update the policy every time a new VM is deployed.


After selecting your resources, the Sources page confirms how many VMs will be protected and provides an option to define exclusions.

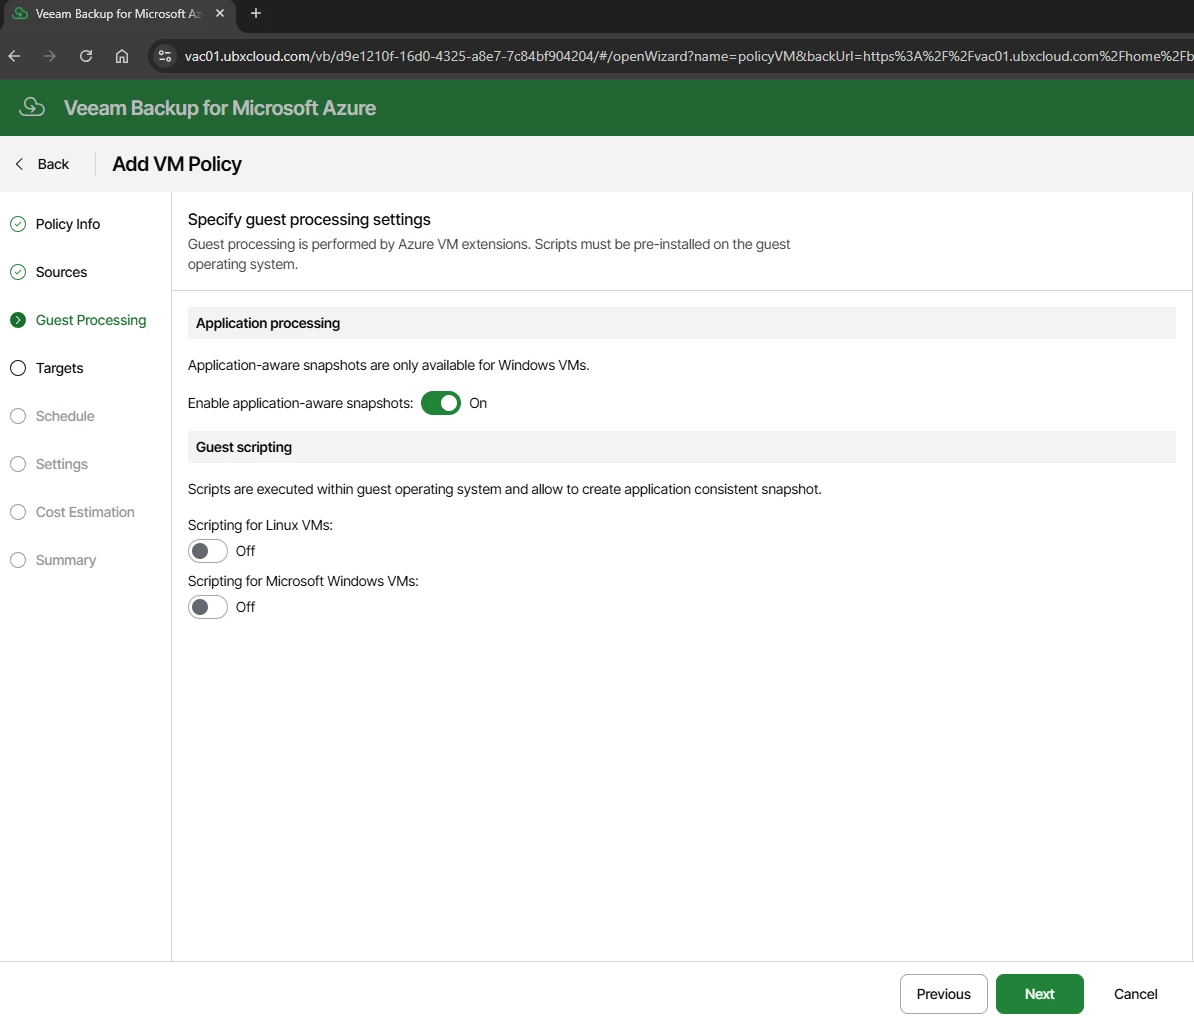
The Guest Processing step controls the internal consistency of each backup:
Application-aware snapshots — When enabled, Veeam uses Microsoft VSS (Volume Shadow Copy Service) on Windows VMs to quiesce applications before the snapshot is taken. This produces application-consistent backups that are safe for workloads such as Active Directory, SQL Server, and Exchange. Enable this for all production Windows VMs.
Guest scripting — Allows custom pre- and post-snapshot scripts to run inside the VM’s operating system. Enable this only if custom application quiescing logic is required and the scripts are already installed on the guest OS.

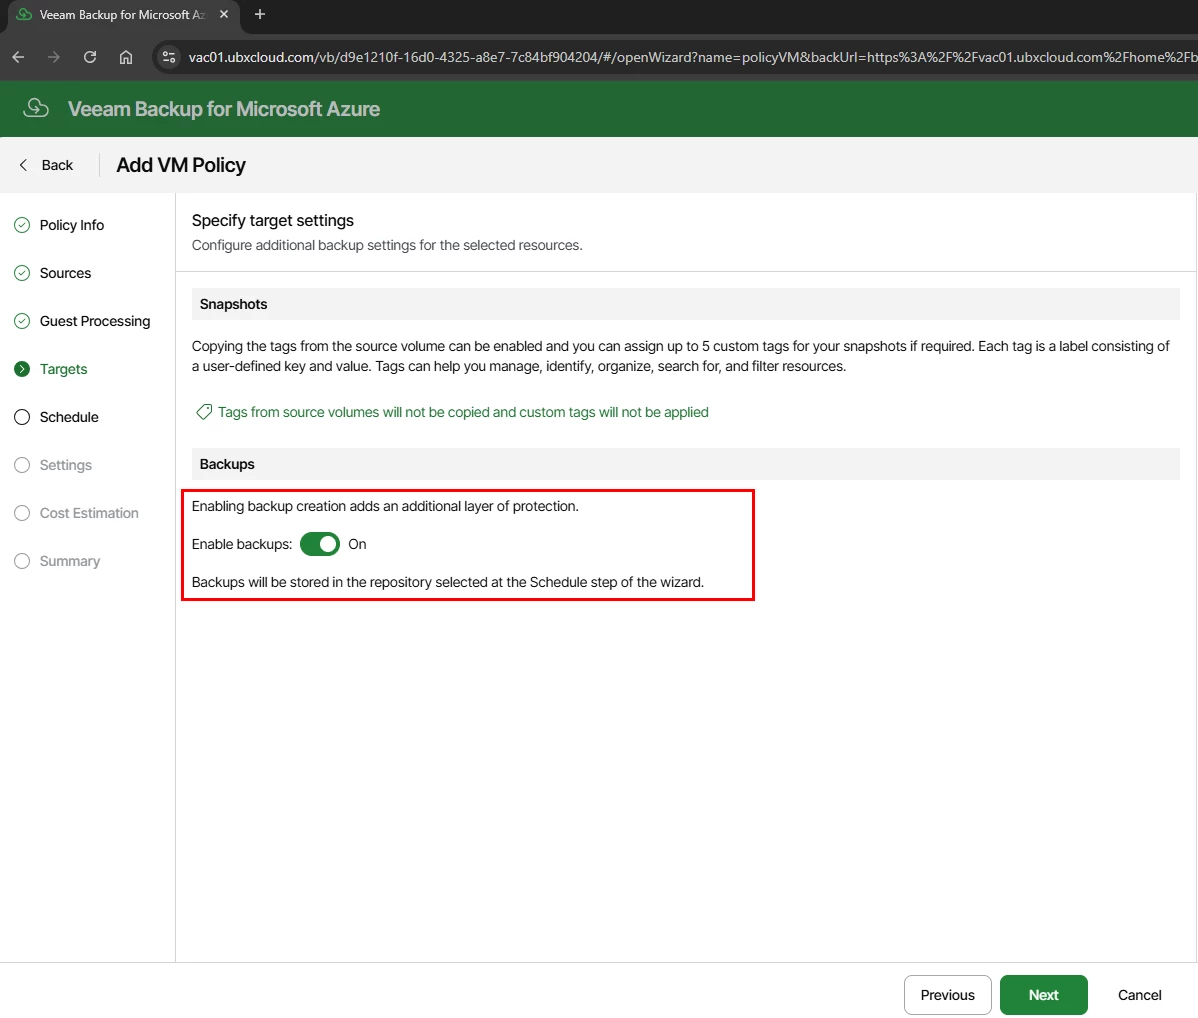
Targets — Enable Backup Storage
The Targets step contains two key sections:
Snapshots: Azure-native snapshots are always created as part of the backup process — Veeam requires a temporary snapshot before it can transfer backup data. You can optionally copy Azure resource tags to snapshot metadata and assign up to five custom tags for organization and filtering.
Backups: Toggle Enable backups: On. When enabled, Veeam copies the snapshot data into a Veeam backup files are stored in Azure Blob Storage. This is what enables long-term tiered retention, cost-optimized storage, and granular file-level restore.
Note: Without enabling backups, the policy creates Azure-native snapshots only. Native snapshots reside on Azure managed disks, cost significantly more per GB than Blob Storage, and do not support file-level restore or long-term tiered retention. Always enable backups for any policy that requires retention beyond a few days.

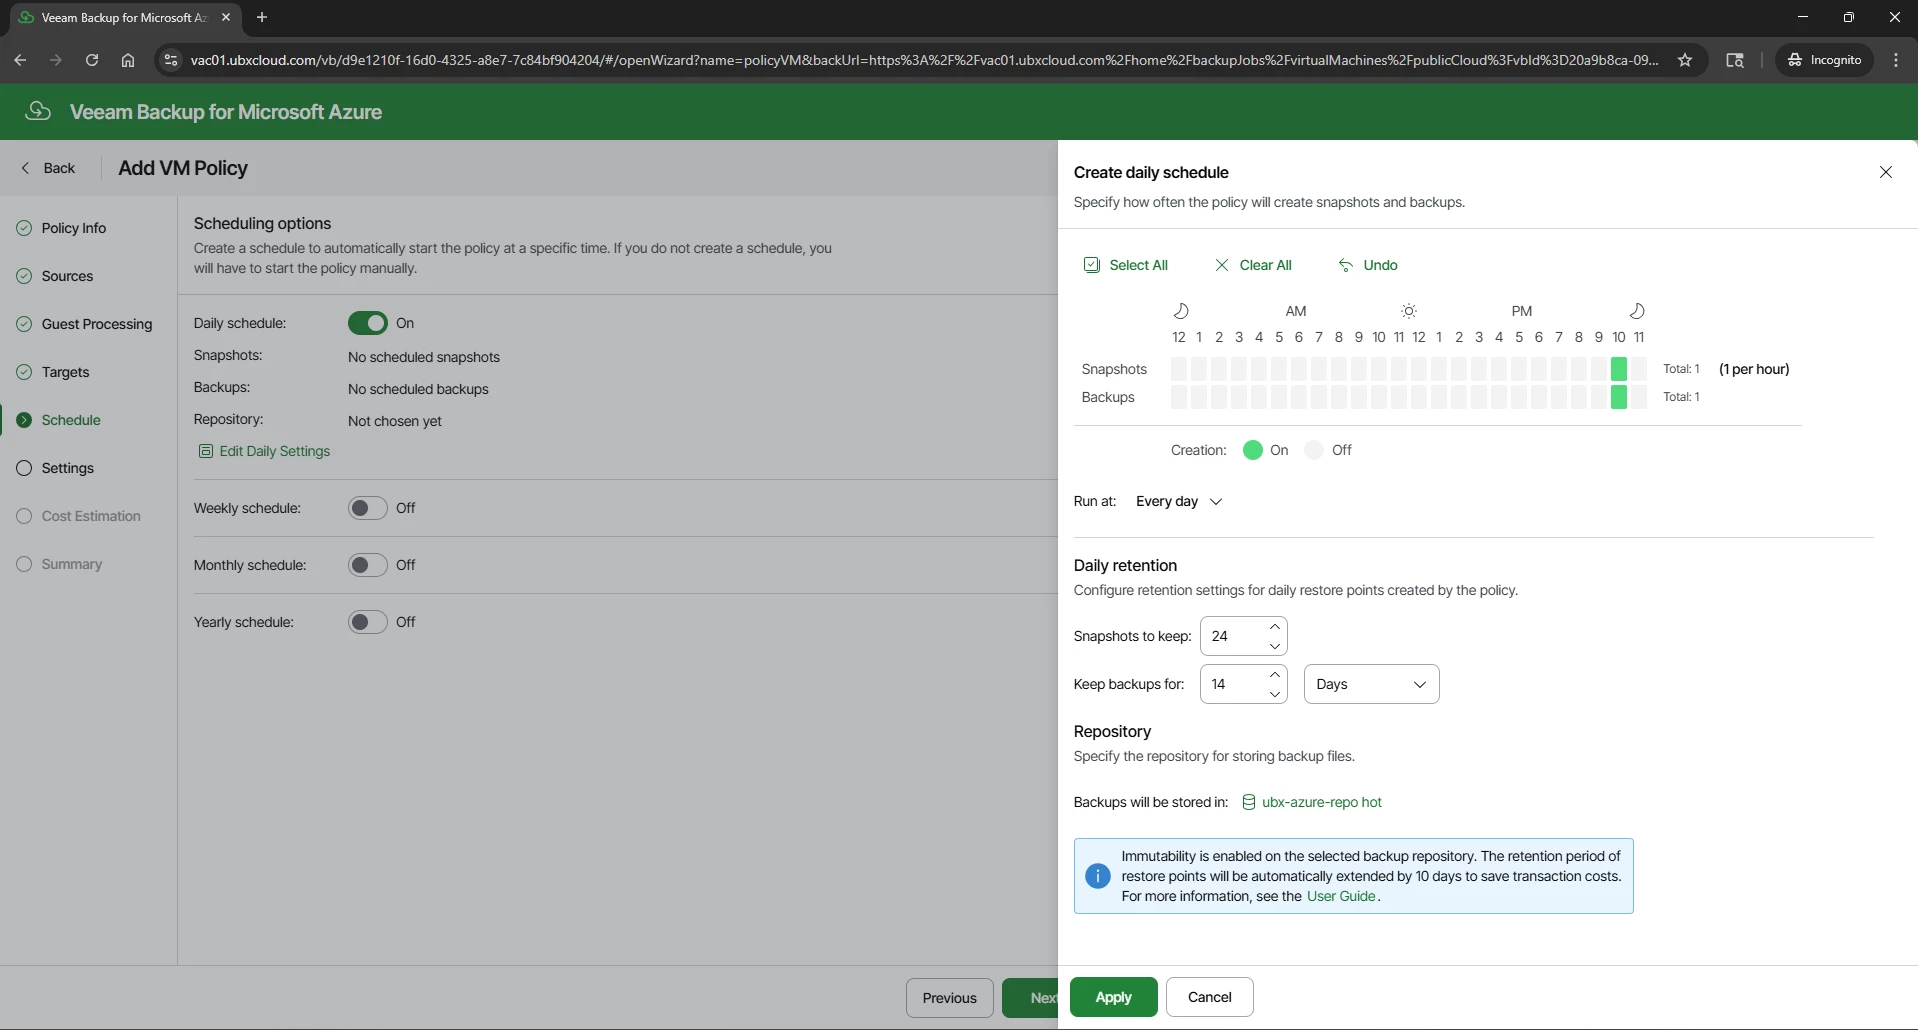
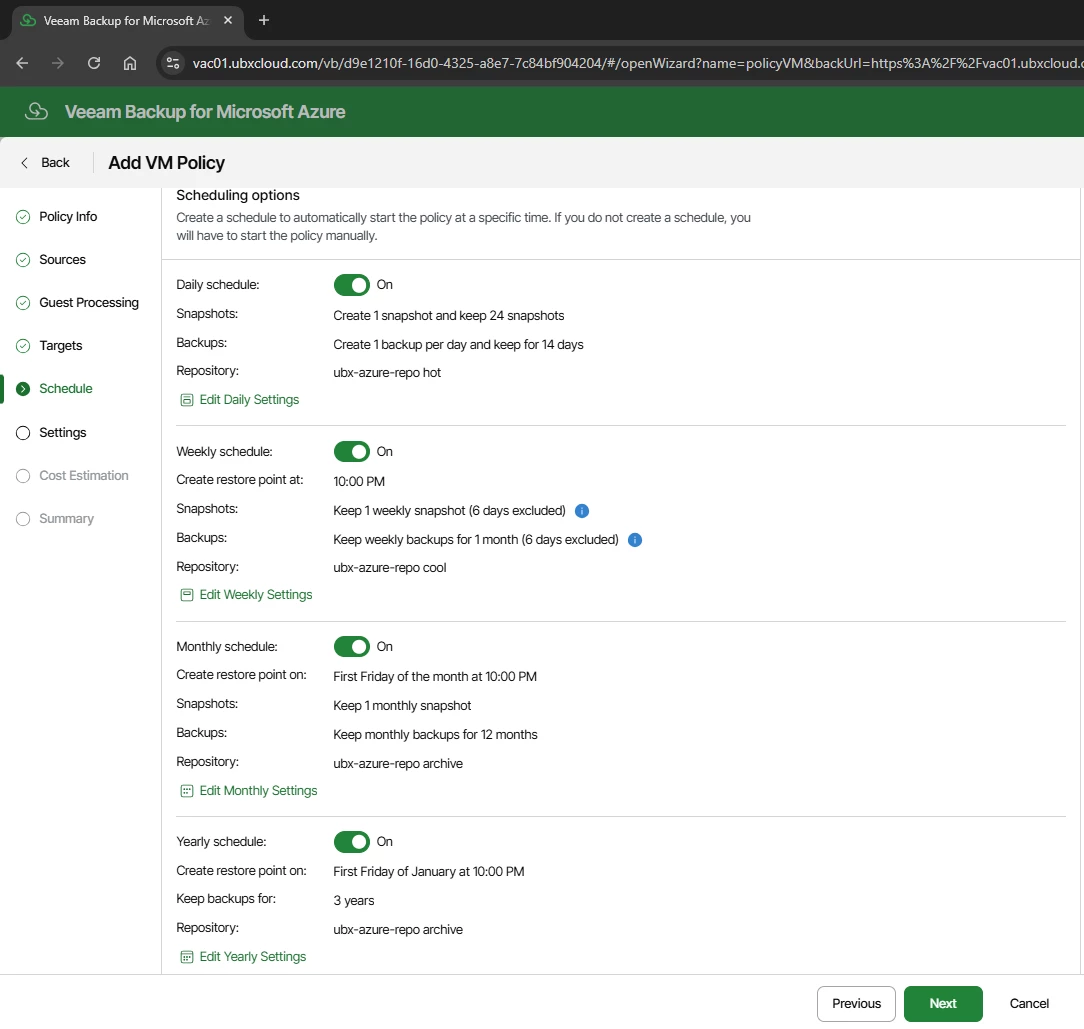
The Schedule step implements a GFS retention model. Four independent schedule levels are available: Daily, Weekly, Monthly, and Yearly.
Each level has its own snapshot and backup frequency, retention period, and repository assignment. Assigning each level to the appropriate storage tier is the key to balancing protection coverage with storage cost.
One important thing to understand is that Veeam Backup for Microsoft Azure uses Azure snapshots during the backup process. Veeam cannot take Azure VM backups without creating a temporary snapshot first. When you select the backup and the snapshot will be enabled by default.

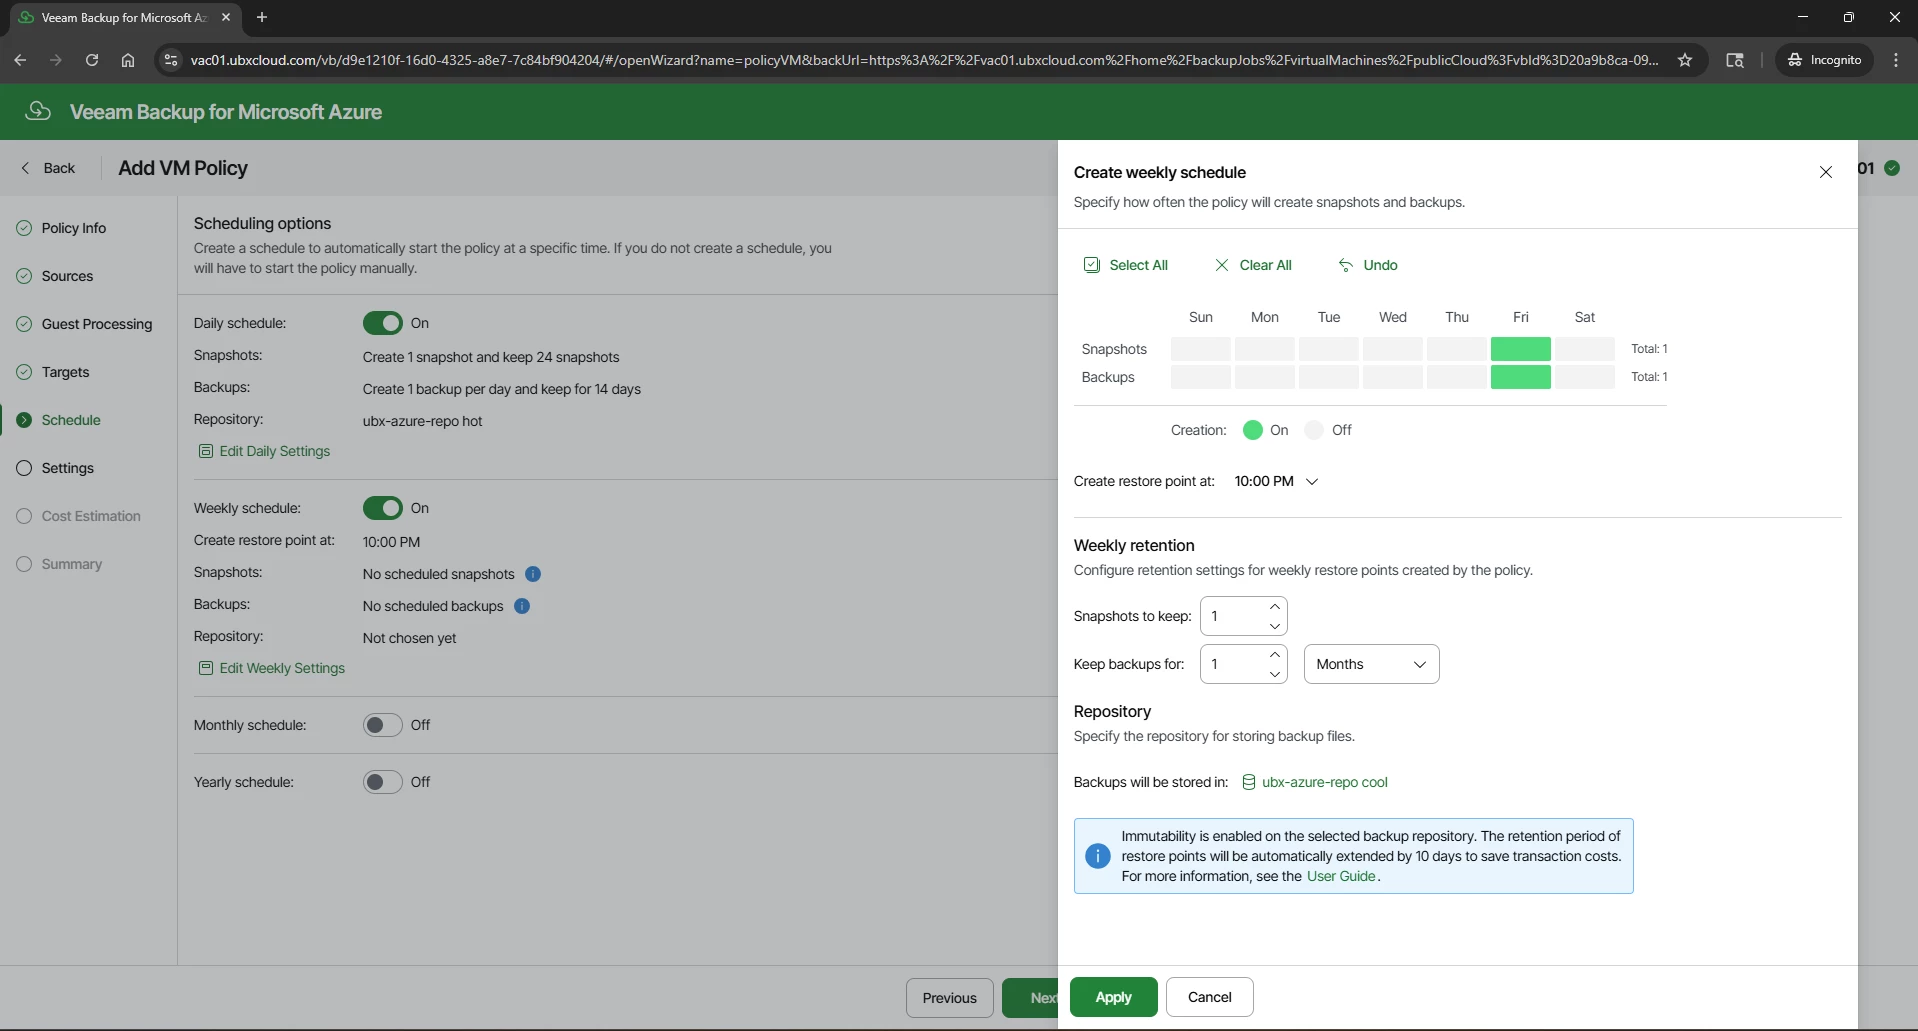


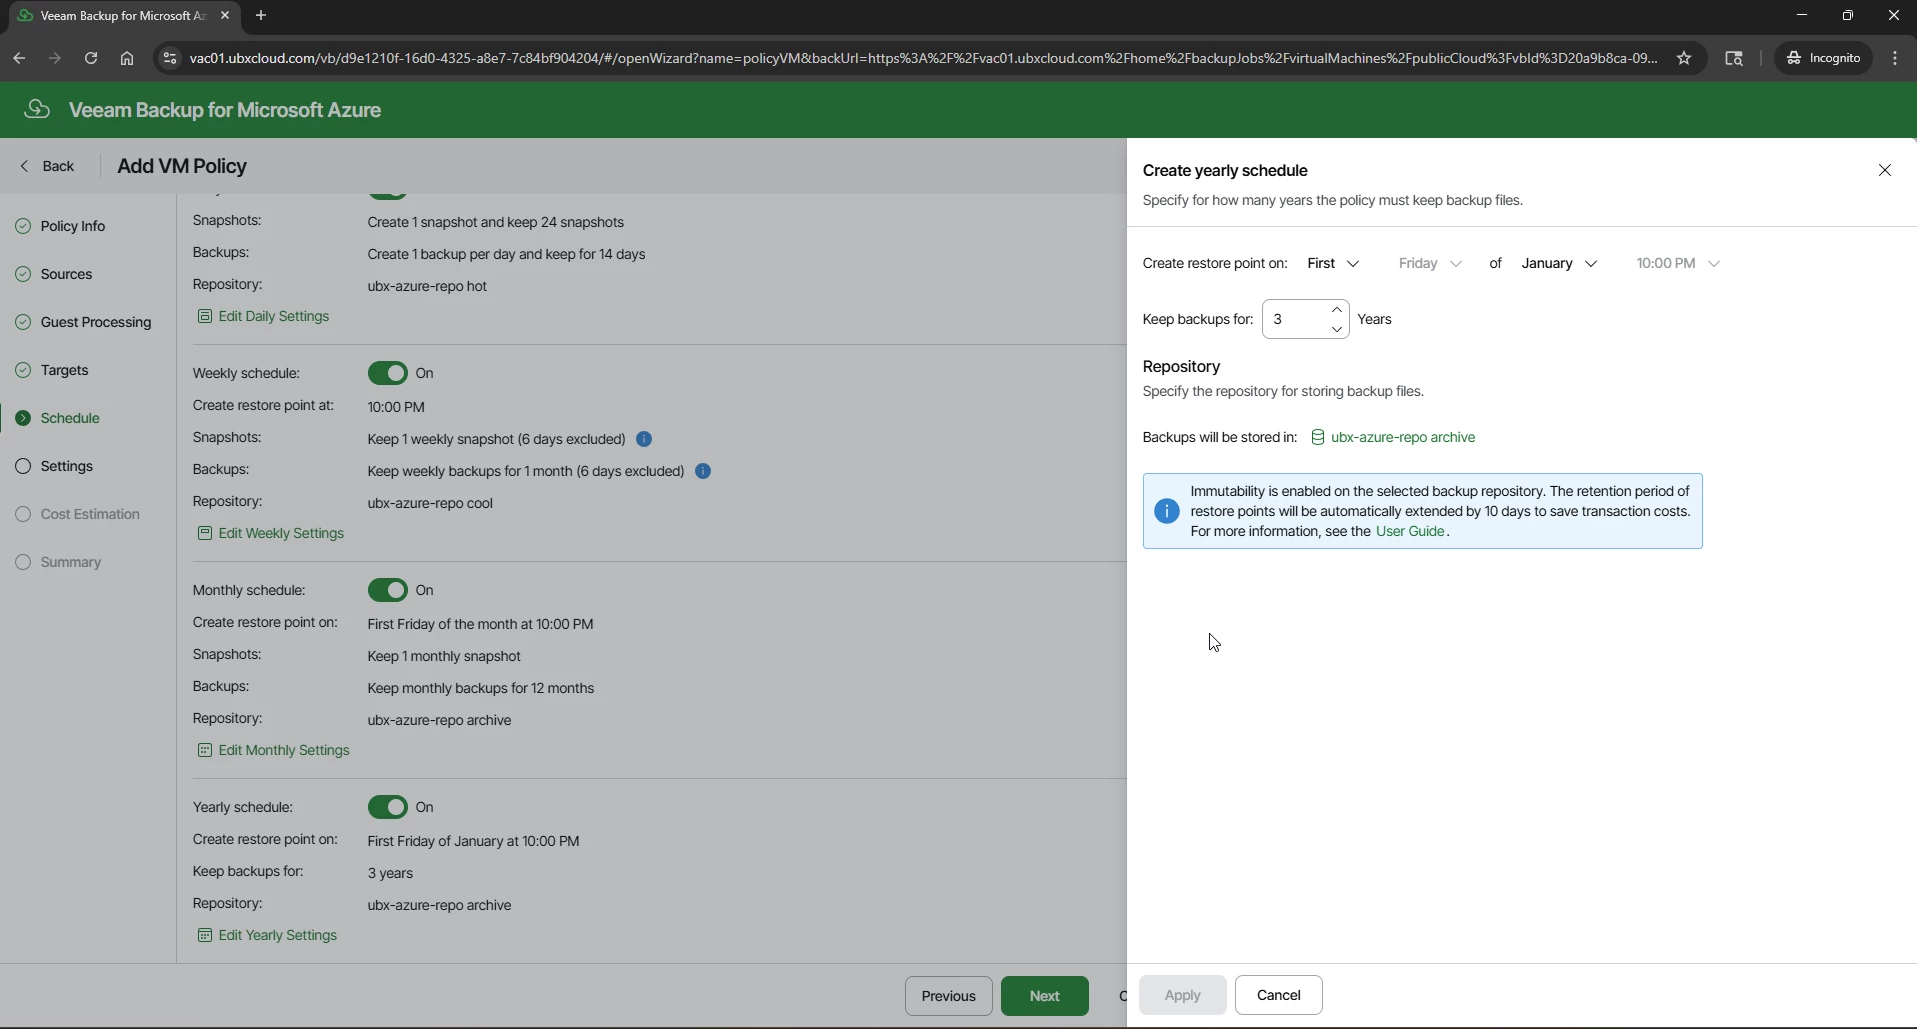

With all four schedules configured, the Schedule page displays a complete summary of the GFS ladder.

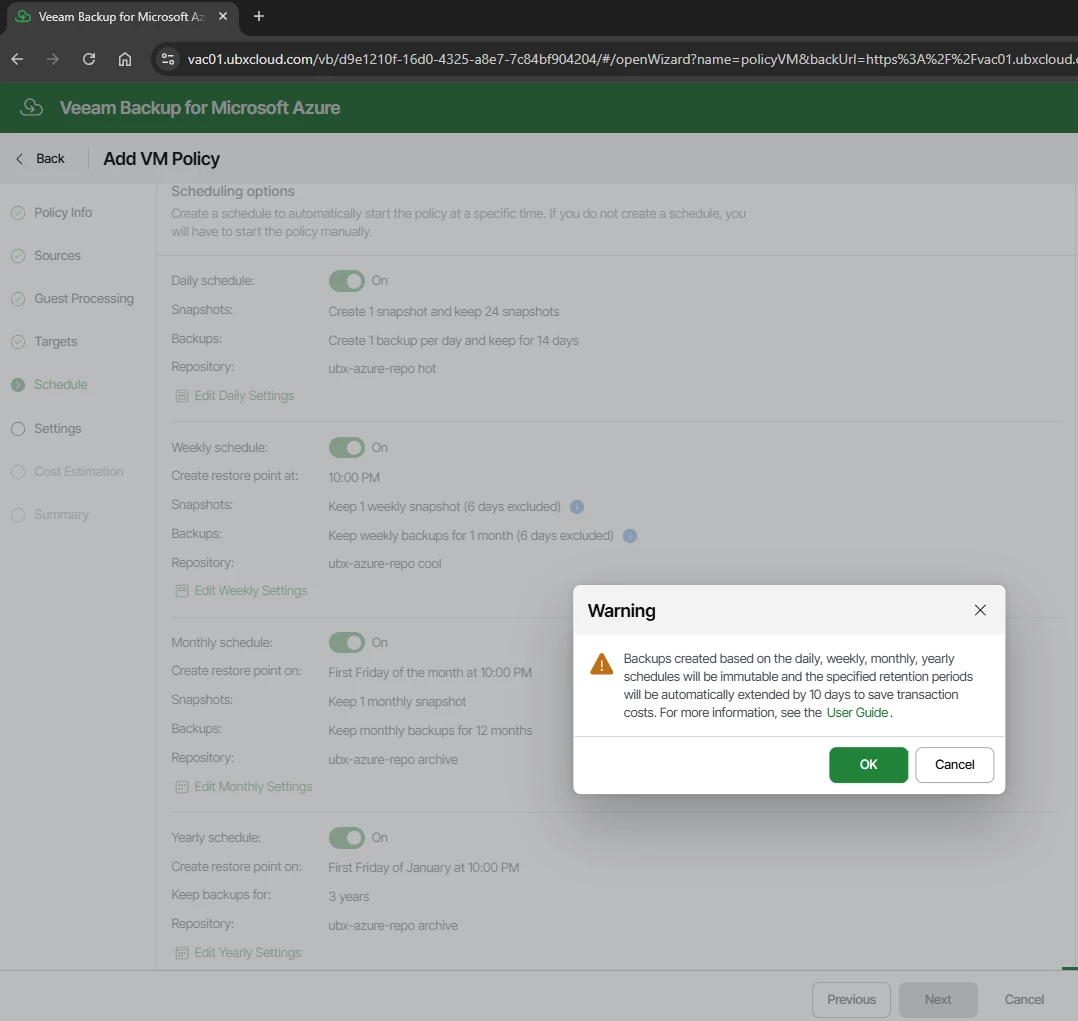
Veeam Block Generation
This extension is a deliberate cost-optimization mechanism. Azure charges a transaction fee
each time an immutability lock timestamp is updated. Rather than updating the lock
individually for every incremental backup block, Veeam groups backup blocks into generations
and applies a single shared expiration timestamp to the entire group and extended 10 days
beyond the configured retention. This significantly reduces Azure Blob Storage API calls,
metadata updates, and transaction costs while ensuring all backup data remains immutable for
the full required period.
Click OK to acknowledge and proceed.

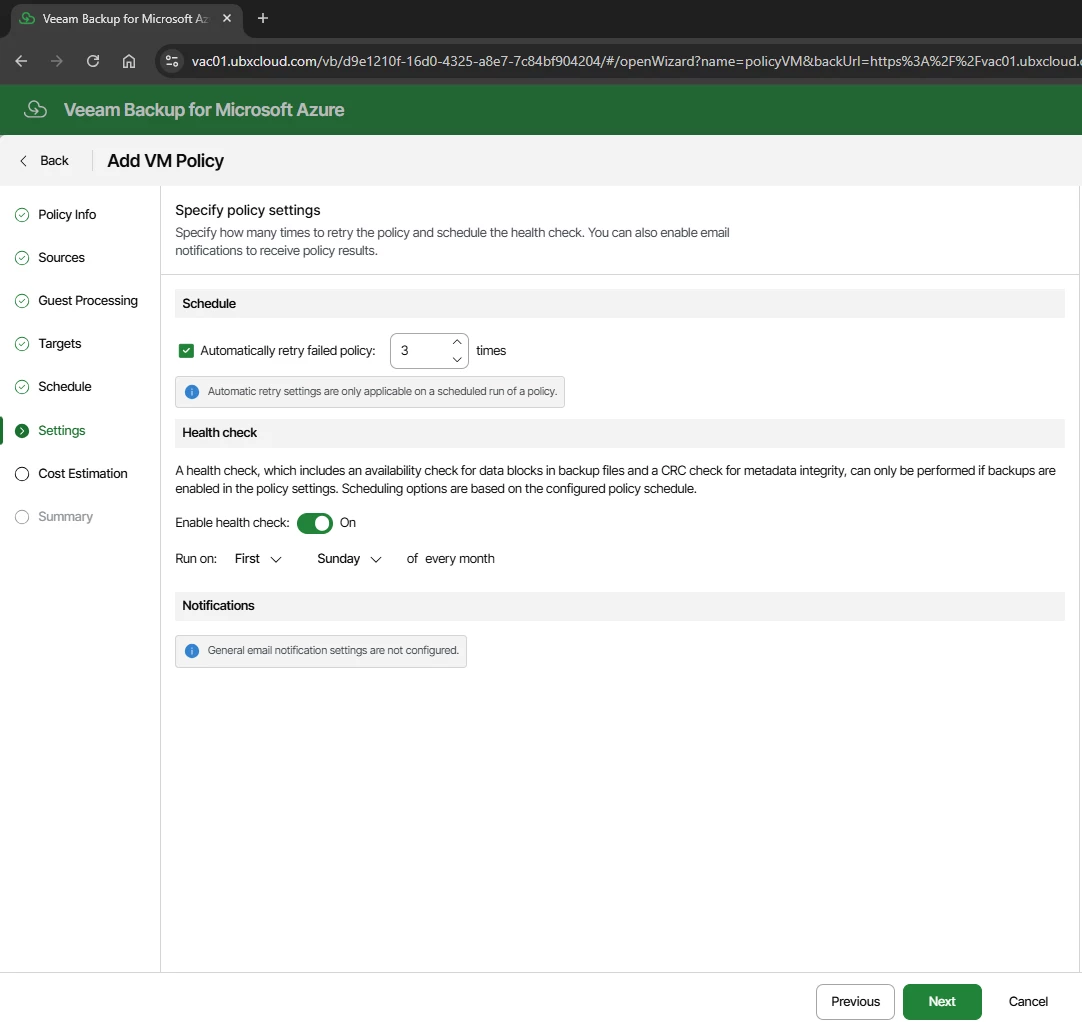
Health check: Enable and schedule for the first Sunday of every month. The health check verifies data block availability and CRC metadata integrity for all backup files. This requires backups to be enabled in the policy. Running health checks regularly ensures your backups are genuinely recoverable before you ever need them in a crisis.
Notifications: Configure email alerts for policy results if SMTP is set up in VSPC.

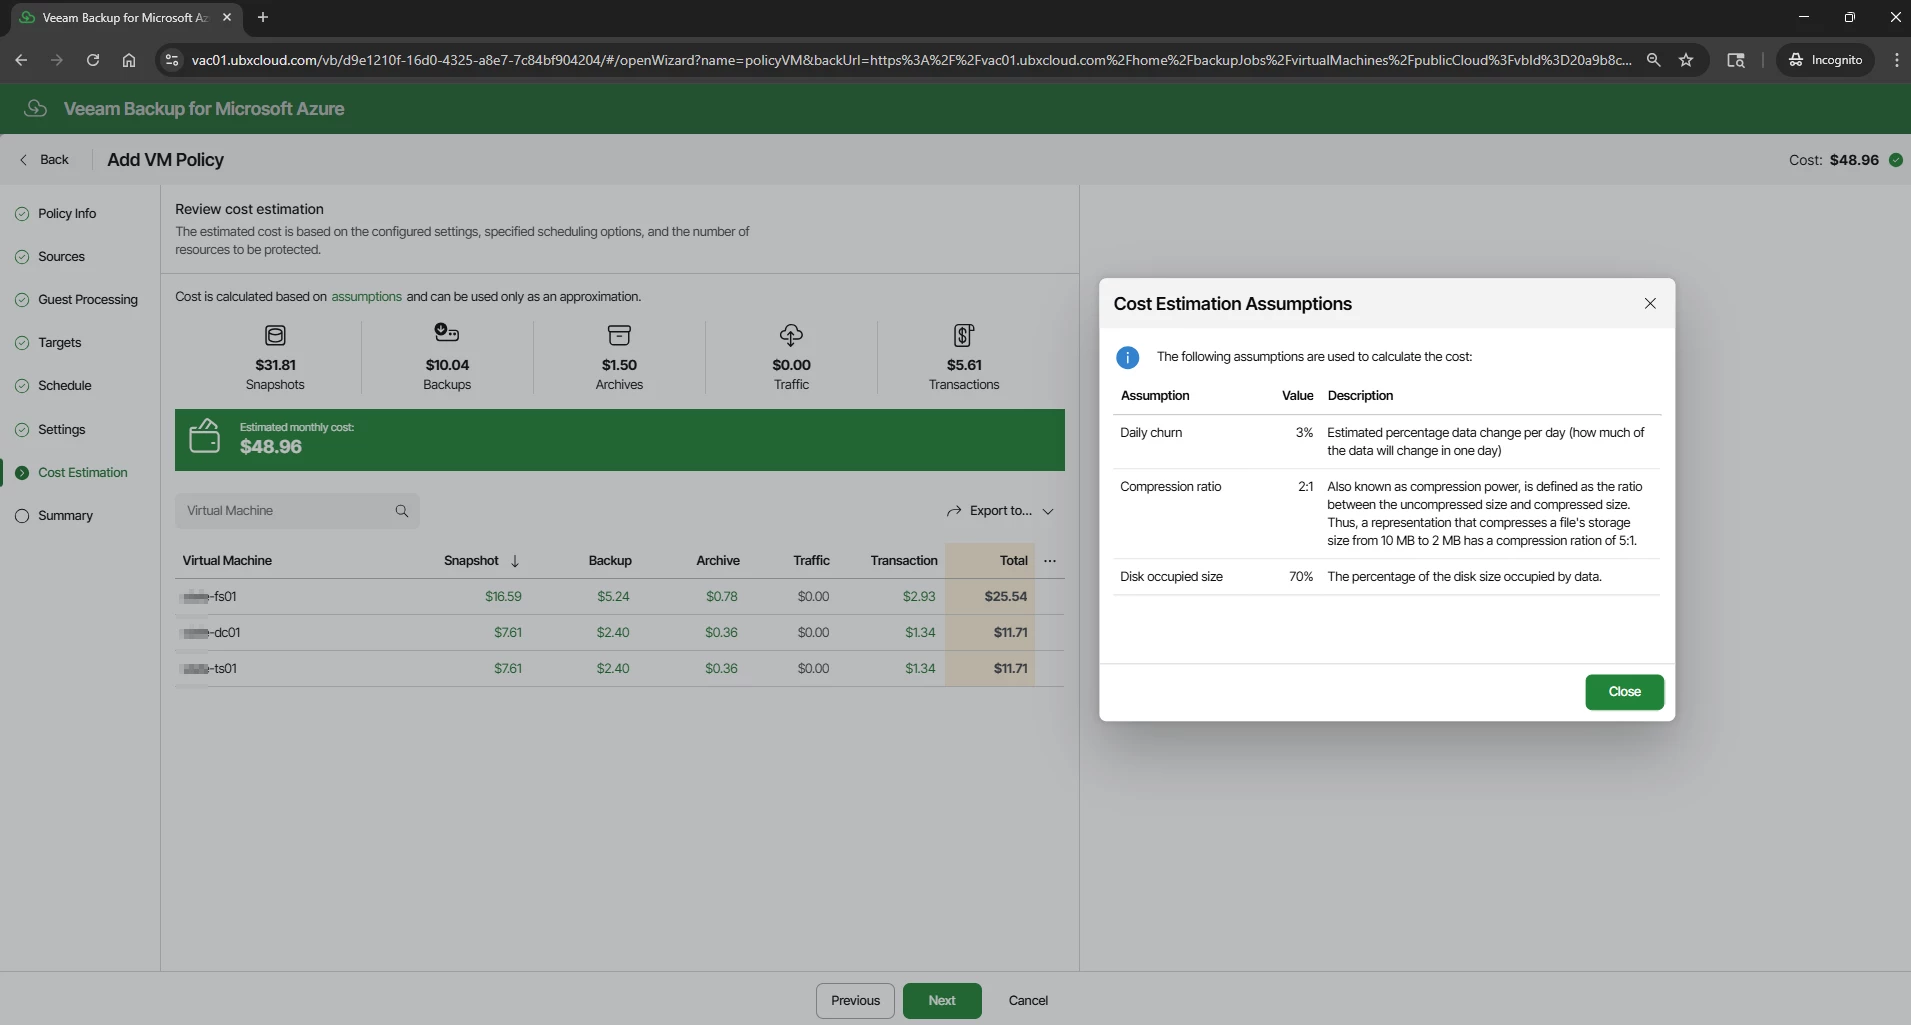
The Cost Estimation step calculates the estimated monthly cost of the policy based on the configured schedule, retention settings, and discovered VM disk sizes. The estimate is broken down across Snapshots, Backups, Archives, Traffic, and Transactions.
In this example, three VMs come to approximately $48.96 per month. Click the Assumptions link to review the model inputs: 3% daily data churn, 2:1 compression ratio, and 70% disk occupancy. Adjust these if the workload profile is significantly different.
This figure is an approximation. Actual Azure charges depend on real VM disk sizes, measured data change rate, current Microsoft pricing, and storage region. Use it as a planning reference, not a billing guarantee.

The Summary step provides a complete review of the policy configuration: general settings, snapshot configuration, snapshot schedule, backup settings, full backup schedule with repository assignments, immutability status, and general settings (retry and health check). Review all sections carefully. Click Previous to make corrections if needed, or click Finish to save the policy. The policy will activate and run at the next scheduled time.
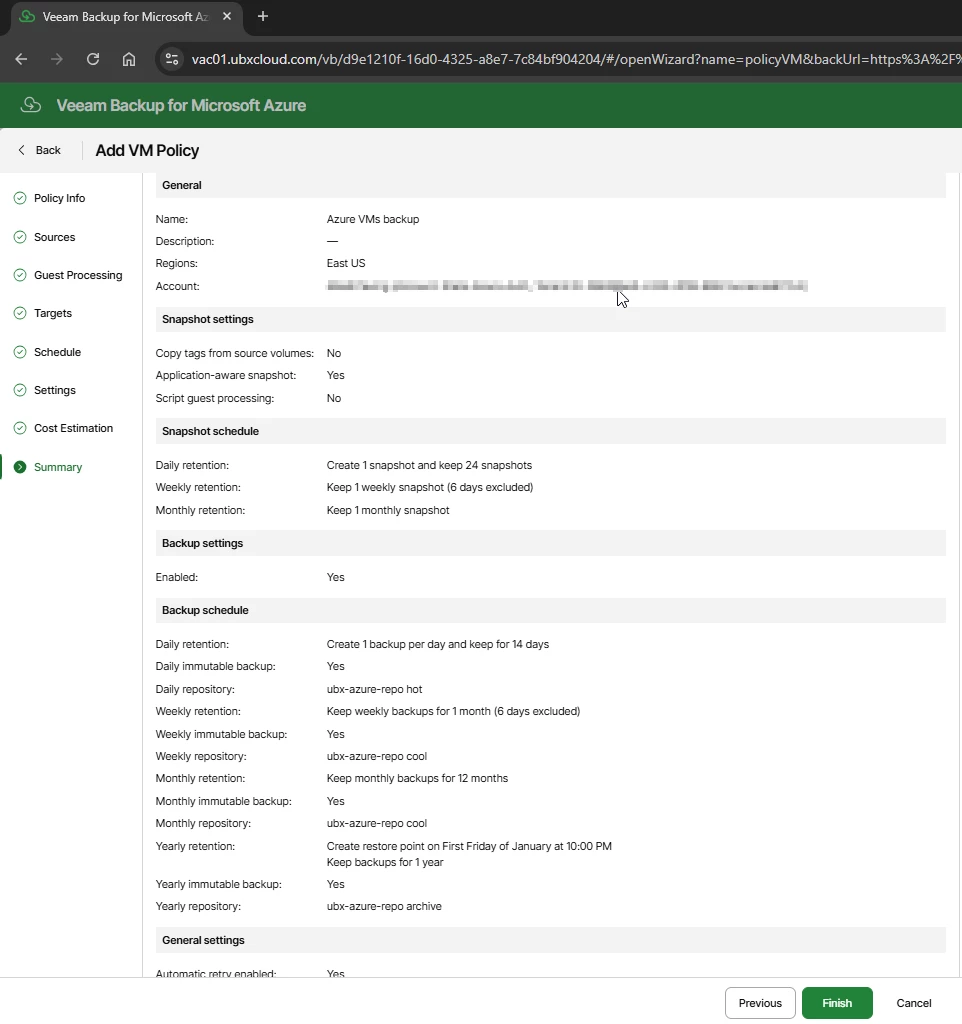

Click Finish to save the policy. The policy will activate and run at the next scheduled time.
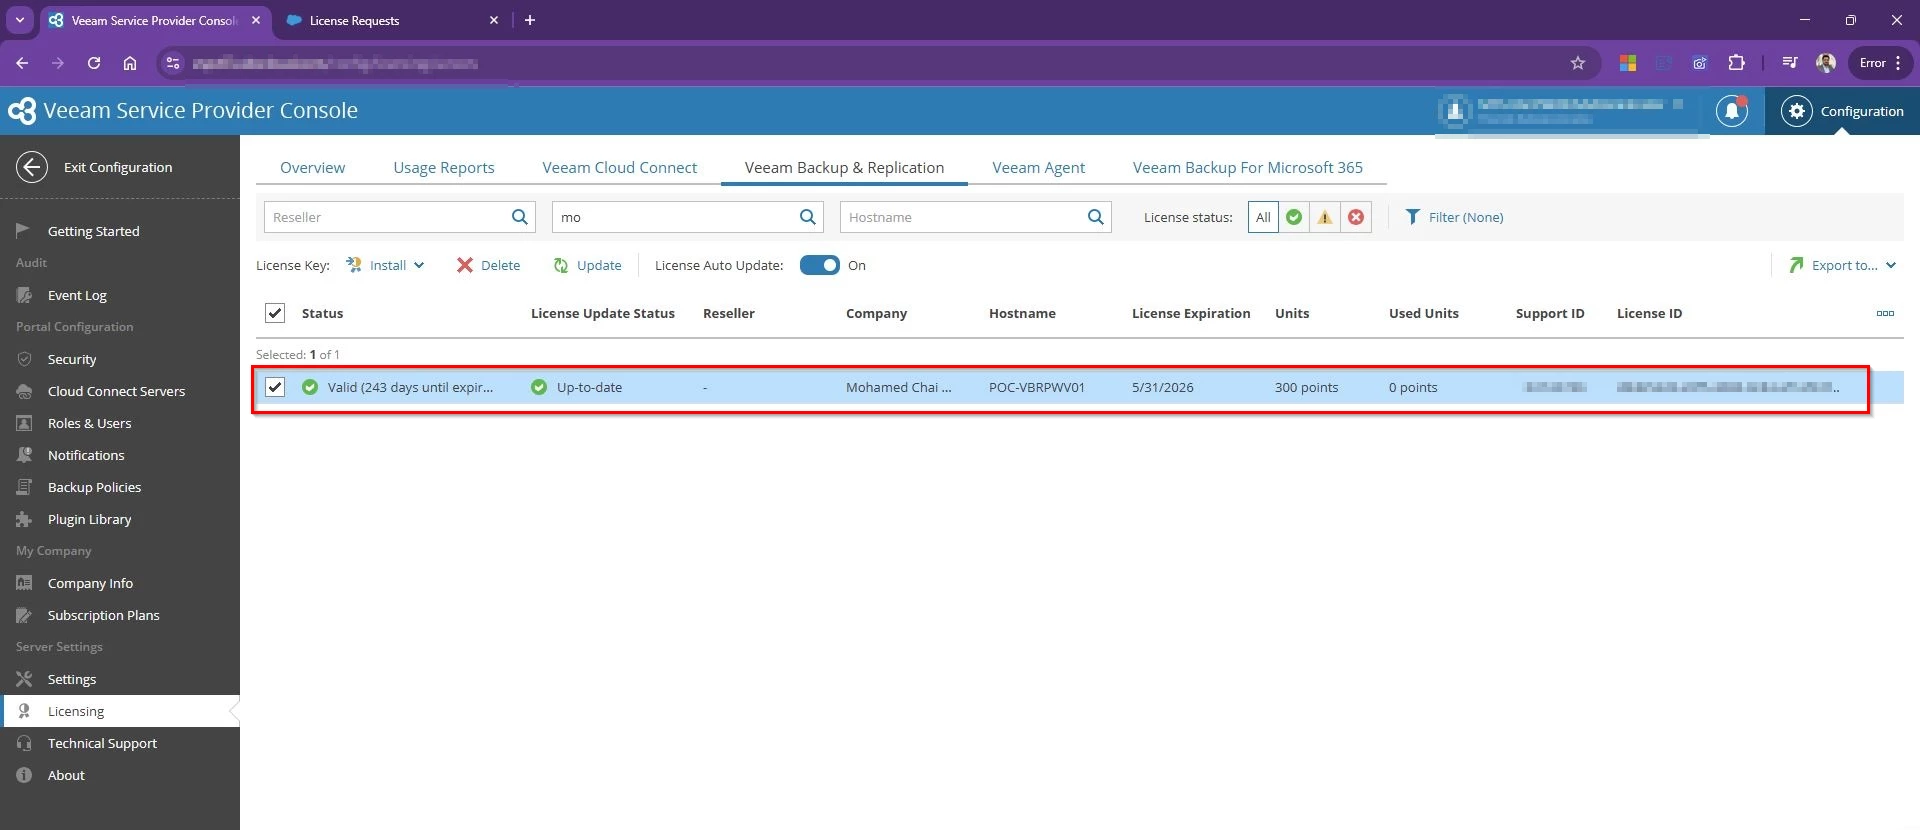
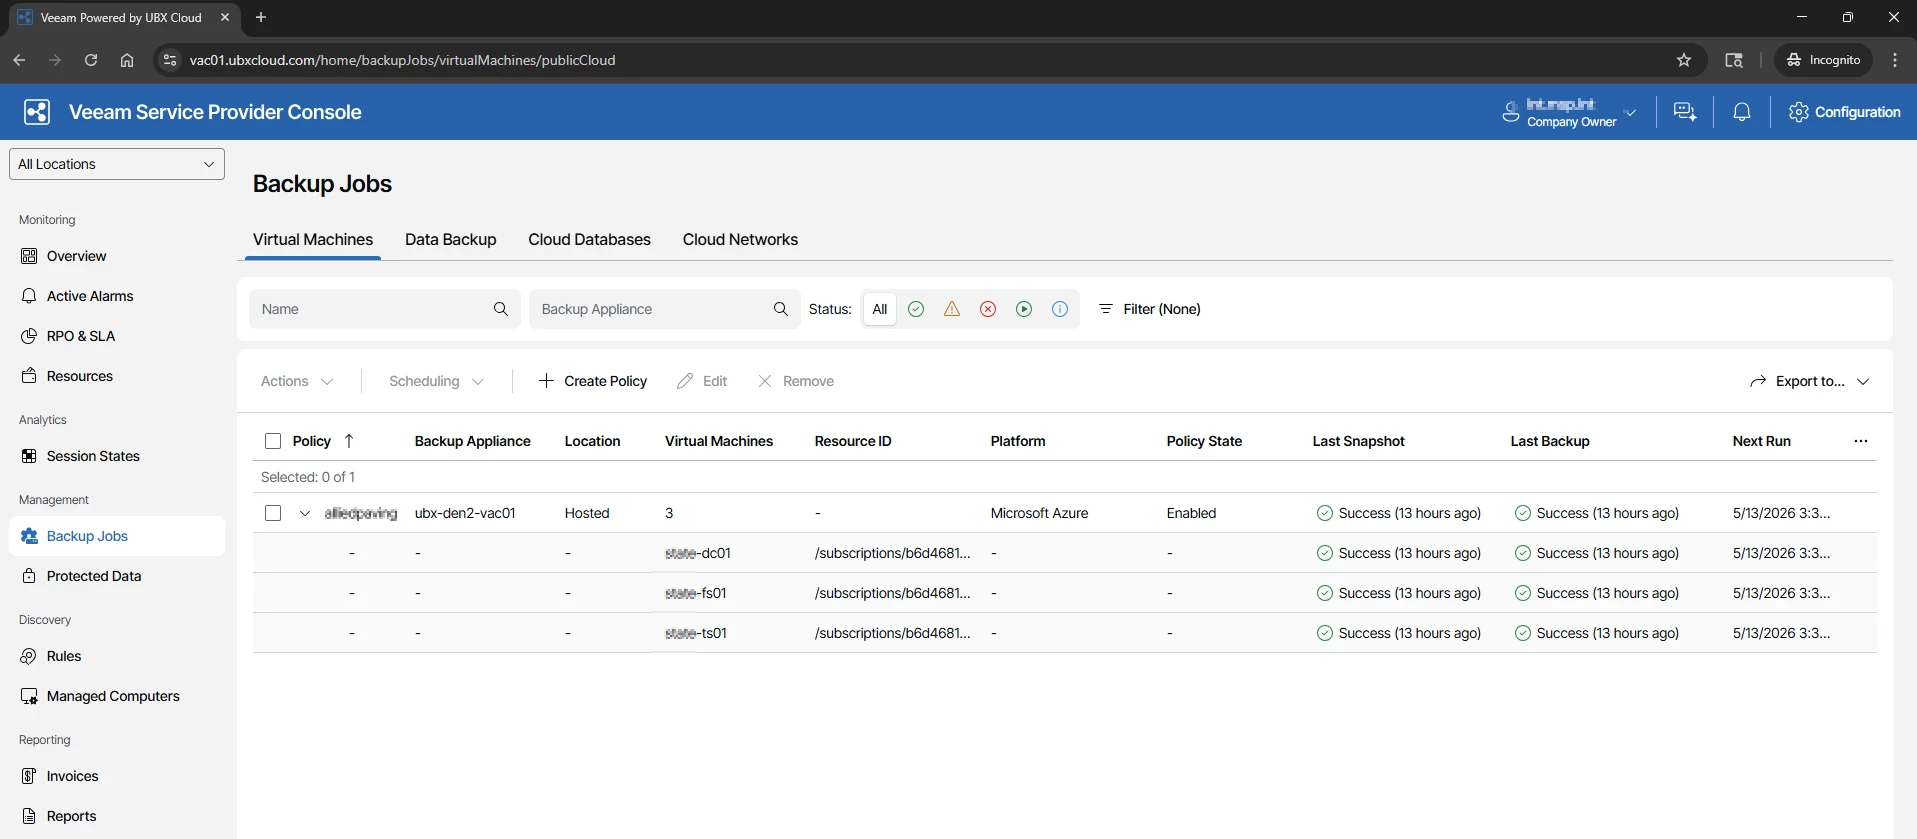
Verifying Backup Job Status
After the policy is saved and the first scheduled run completes, return to Backup Jobs → Virtual Machines in VSPC. The Last Snapshot and Last Backup columns will reflect the result of the most recent run

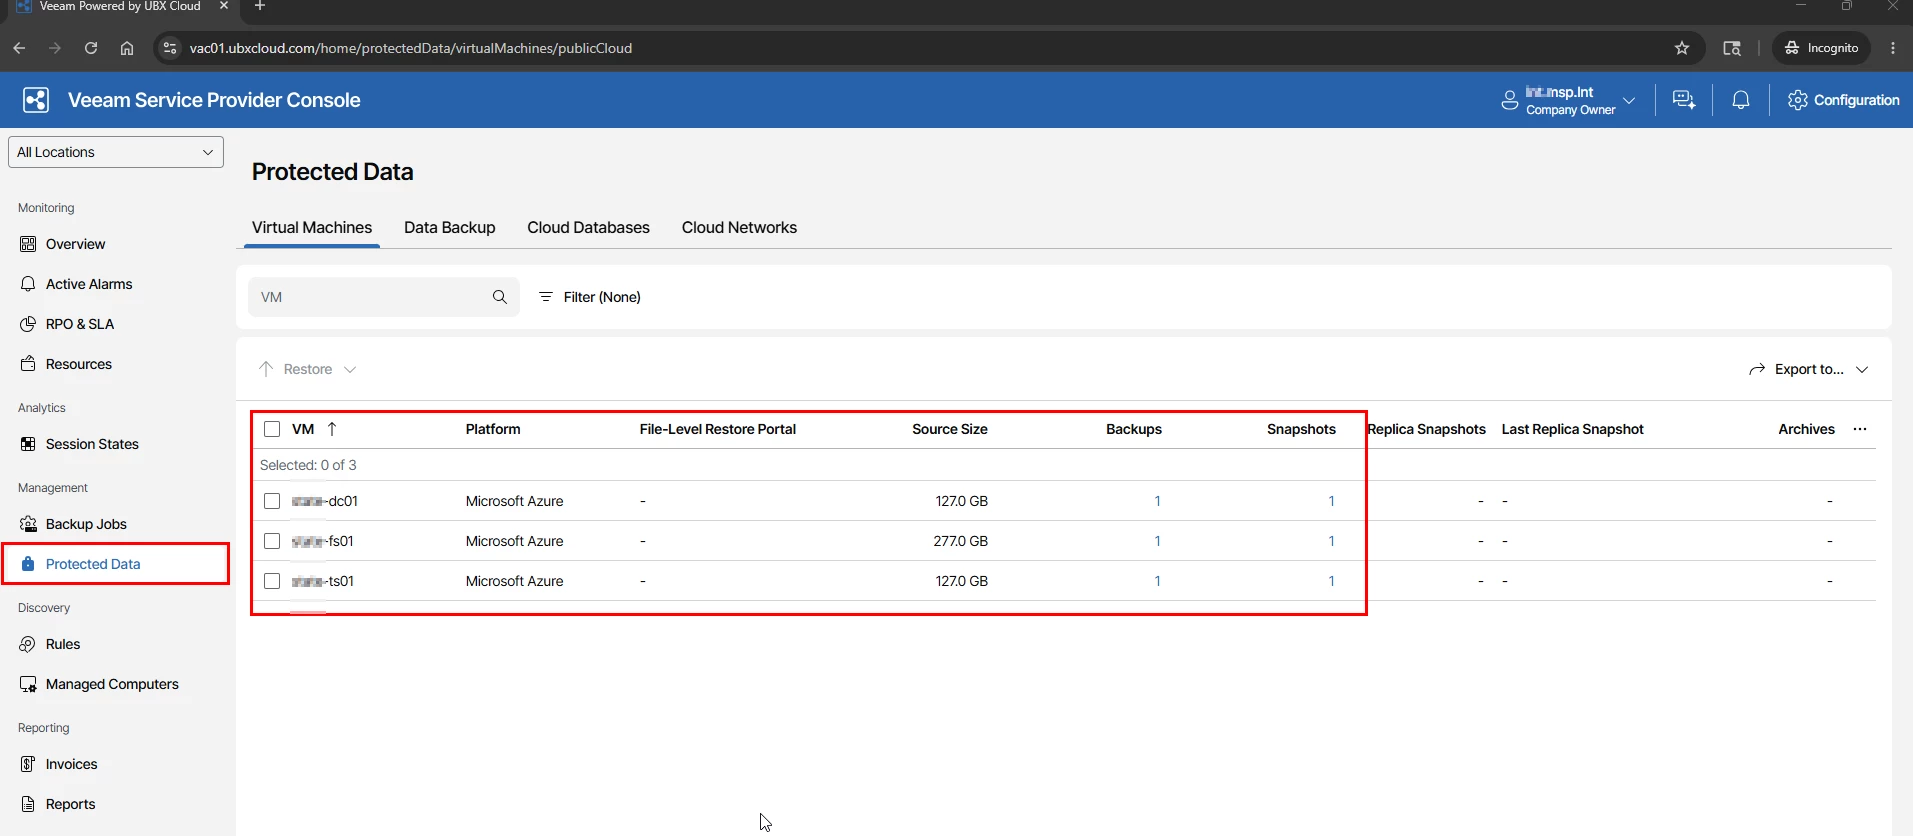
Reviewing Protected Data and Restore Points in VSPC
Once your backup policy has run successfully, you can review all protected VMs and their available restore points directly from the VSPC portal — without needing to open the VBR console.
Navigate to Protected Data in the left sidebar and select the Virtual Machines tab.

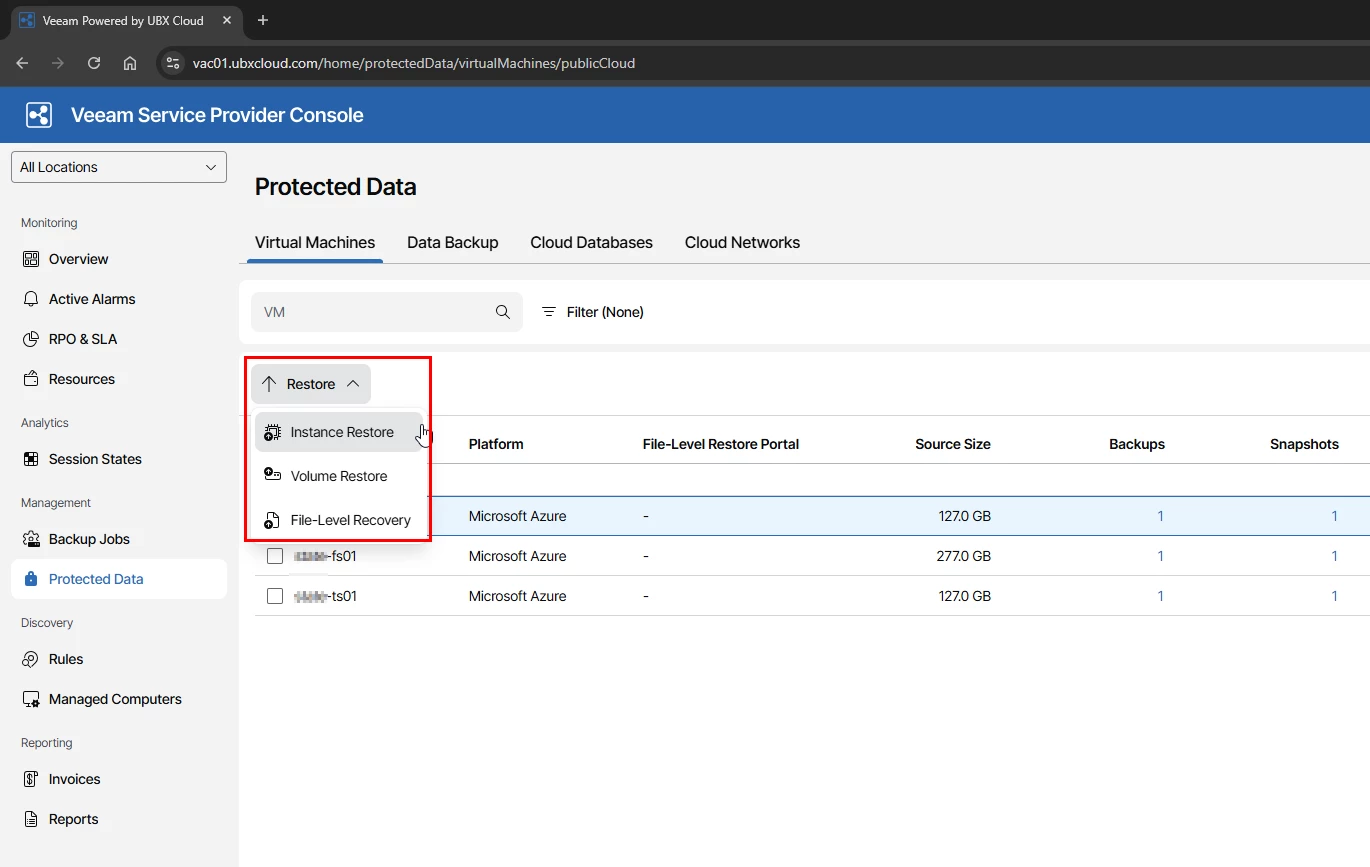
Restore Options Available from Service Provider Console
Veeam Backup for Microsoft Azure provides multiple recovery options directly from the VSPC console.
Select the protected VM and click Restore.
The following recovery options are available:
Instance Restore- Used to restore the complete virtual machine to Azure.
Volume Restore – Used to restore specific disks or volumes from the VM.
File Level Recovery – Used to recover individual files and folders without restoring the full VM.
These recovery options give administrators flexibility to perform both full VM recovery and quick file level restores depending on the situation.

I will cover these restore options in more detail in the next part of this blog series, including practical recovery scenarios and step by step restore operations using Veeam Service Provider Console.
Thanks!